Pages

Sunday, April 29, 2018

Clean & Simple Makes Me Smile


I love the look of a Clean and Simple card and add watercolouring to it too and it is guaranteed to make me smile. Today, I am sharing such a card on the Magenta blog.


Supplies: XL 140 lb watercolour paper (Canson), Floral stencil, Happy Birthday stamp, Aquamarine, Spring Green and Violet Nuance powders (Magenta), white cardstock (CTMH), black cardstock (Bazzill), Clear and white embossing powder, Wonky Rectangle die (Simon Says Stamp), Emboss It dabber (Ranger), jewels (Offray)


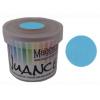
I started with a piece of 140lb cold press watercolour paper and clear heat embossed using the Floral Pattern stencil. Next, I used a wet on wet watercolour technique to add colour. I pre-wet the area around the image emboss resist that I wanted to colour and then added Nuance powders (VioletSpring Green and Aquamarine) pre-wet as watercolours. While it was drying, I stamped and white heat embossed the Happy Birthday sentiment on black cardstock and cut it to size. Once the panel was dry, I die cut it and mounted it on a cardbase. I popped up the sentiment and added some jewels to the flower centres.

*****

Magenta products used:

TM188 Floral Pattern
TM188
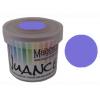
Nuance - MNU012 - Violet
MNU012
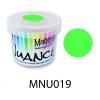
Nuance - MNU019 - Spring Green
MNU019
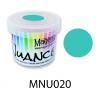
Nuance - MNU020 - Aquamarine
MNU020
Happy Birthday
07.743.G


I hope my Clean & Simple Birthday Card made you smile today and that you are inspired to give it a try.


TTFN,


Saturday, April 14, 2018

Magenta Smile Rainbow Style


With the absence of spring like weather here in Ontario (we are forecast for another snow storm which is not the norm for mid April), I am in need of some sunshine cheeriness. So today's card that I am sharing on the Magenta blog is bright and rainbow colourful.


I started with a piece of 140 lb watercolour paper and clear heat embossed the background with the Flying Butterflies stencil. Next, I added colour with a rainbow assortment of Nuance powders used as watercolours along with little splatters as I completed each colour. Once dry, I used a black marker to outline the butterflies and stamped the Smile sentiment with black heat emboss. Lastly, I matted it on black cardstock, added it to a cardbase, and added a few bitty jewels under the sentiment. 


*****

Magenta products used:


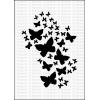
TM252 Flying Butterflies
TM252
Nuance - MNU005 - Hot Pink
MNU005
Nuance - MNU008 - Golden Yellow
MNU008
Nuance - MNU002 - Bright Yellow
MNU002
Nuance - MNU009 - Grass Green
MNU009
Nuance - MNU001 - Turquoise
MNU001
Smile
07.558.E


I hope this Smile card brightens your day!


TTFN,


Wednesday, March 28, 2018

Be HAPPY!


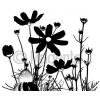
Oh, I am loving the new Magenta Spring Silhouette Flowers stamp! Today, I am sharing another cheery Magenta card on the Magenta blog that I made using it with an offset stamping technique on kraft paper.


I started with a piece of kraft paper securely placed in my MISTI with the stamp aligned in the centre bottom portion. Using a juicy white pigment ink pad, I stamped the silhouette flowers multiple times so that it was a crisp white image. Once it was dry, I realigned the stamp to off set it a smidgen so that it would leave some white showing and a darker area when stamped with coloured ink. 


I used Faber-Castell Design Memory Crafts Big Brush markers for stamping because they are India ink and permanent when dry plus the brush allows the colouring of detailed sections without the need to mask the stamp. I started by colouring each type of flower and then did the green in smaller sections as the ink dries fairly quickly. A stamp postioning tool is essential in order to do this technique as each colour was stamped three times to get the colour intensity on the white. 


Once dry, I went over all the blooms with glossy accents which was another reason that I wanted to use a permanent ink. I mounted the panel on a card base with a pink burlap strip and added the white heat embossed "be HAPPY" portion of the sentiment stamp on pink cardstock. To finish it off, I added some doodle stitching and a few sequins. 


*****

Magenta products used:

Spring Silhouettes - Flowers
0753.P
So Many Reasons...
07.972.F
You can checkout my Magenta blog post here.


TTFN,


Thursday, March 15, 2018

Birthday Flowers - Magenta Spring/Summer 2018 Release


Today, I have a Magenta watercolour card made from a silhouette image. I am very excited about many of the new products as part of the Spring/Summer 2018 release. I am especially loving the new silhouette images and the possibilities that they possess. For my first creation from the collection, I made this birthday card with the Spring Silhouette Flowers using a MISTI and Zig Clean Color Real Brush markers on 4" x 6" 140 lb cold press watercolour paper.


I began by using the markers to individually colour sections and then spritz them with water before stamping onto the paper. That is the beauty of using a stamp positioning tool as you can do things with your stamped images that would be virtually impossible to do without them. I started with the yellow flowers. Then, I did the pink flowers. Next, the blue flowers and lastly, all the greens. As I transitioned between colours, I would clean off the stamp so as to not get mud. You can always go back in and repeat stamp a section until you are pleased with the colouring. I did go in and add a little brown to the echinacea centre in the end.


Once dry, I ran the green marker over a small patch of my craft mat and added some water and then used a watercolour brush to add splatters. While it was drying, I cut a piece of kraft scrap paper to 1 1/2" x 6". Using the MISTI, I stamped the Happy Birthday sentiment. Again, this was made possible because of utilizing a stamp positioning tool. I had cut the sentiment apart to that I could have the sentiment run horizontally verses its original stacked vertical positioning. I doodled in the diamonds between the sentiment repetitions.


Now, I was ready to assemble the card. On a 4 1/2" x 6" cardbase, I adhered the kraft sentiment section to the bottom and then used a 4 1/4" x 5 3/4" piece of fun foam to adhere the watercolour panel at the top. Next, I adhered the two stripes of twine with one on the lower section and the other on the top edge. Lastly, I used the Flying Butterflies stencil and chose three of the smaller butterfly sizes to add the butterflies using a Stardust Gelly Roll pen to add a bit of sparkle.


I hope this tutorial gives you some ideas to expand your thinking around silhouette images and their potential for beautiful colourful creations. You can check out my post on the Magenta blog here.


*****

Magenta products used:

TTFN,

Supplies used: XL watercolour paper (Canson), Spring Silhouette Flowers and Happy Birthday stamps, Butterflies stencil (Magenta), Zig Clean Color Real Brush markers (Kuretake), Coffee Archival ink (Ranger), Gelly Roll Stardust pen (Sakura), brown felt tip pen (Staedtler), white and kraft cardstock (CTMH), twine (Dollarama)


Monday, February 26, 2018

Sending a Blizzard


Hello friends! I am off at Scrapbook and Cards Today's Crop & Create today and I am sending a little Magenta love your way with this snowflakes inspired card. 


I started with 140 lb cold press watercolour paper and used the snowflakes mask with Cerulean Blue and Wisteria Nuance powders along with texture paste (on the first) and gel medium (on the last two) to create four panels in differing hues. Once dry, I tore the end 1 1/2" strip off, worked the raw edges to give them some curl and glued them to a base card. Next, I stamped the sentiment with white pigment ink onto a piece of black cardstock and adhered it with foam tape for more dimension.

*****

Magenta products used:


TTFN,


Friday, February 16, 2018

With Great Love


I am up on the Magenta blog today with this Clean and Simple style card featuring a heart created using a stencil, ink and doodling.


I started by securing the Happy Heart stencil to the cardbase and crafting mat to ensure that it would not shift as I blended Distress Oxide inks on in an ombre fashion. Before removing the stencil, I added a spritz of water to activate the ink and provide more textural interest. After removing the stencil, I added the doodling along the edges and stamped the Do Small Things With Great Love sentiment and the Cross Hatched Heart using black ink. Then, I added some Wink of Stella to the two black hearts to provide some shimmer. Lastly, I added some sequins, to the circle areas.


TTFN,


Magenta products used:

Tuesday, February 6, 2018

Magenta Team Tues Current Favourite Stamp


On one Tuesday each month, Magenta features DT member's tips and/or tricks in regards to a crafty topic. This month, the team is sharing projects made with their favourite Magenta stamp. 


I have many favourite Magenta stamps but my current favourite stamp is the large Zen Sunflower Bird (yes.. this little beauty even comes in a smaller version). On this shaker card, I heat embossed the Zen Sunflower Bird on watercolour paper, coloured it with Distress inks, and fuzzy cut it out when dry before adhering it to the heat embossed Leafy Branch foliage on the acetate. I heat emboss stamped the Sending You Sunshine stamp on the die cut stitched rectangle window frame. It is such a cheery bird that it brings a smile to my face.


You can see other ways that I have used the bird...


here I used it on vellum...


and here, you can learn how to reverse or mirror stamp the image.


*****

Magenta products used:


You can check out my fellow Magenta DT members' faves in the blog post here.

TTFN,


Sunday, January 21, 2018

Give Wings To Your Passion

Hi All!

Today I am sharing an upcycled tag with a bird theme inspiration by Simon Says Stamp Monday Challenge: Birds of a Feather.


The tag is from a beautiful cozy Christmas present throw from Indigo/Chapters. It is a great cardstock weight and had a gorgeous gold foiled border. I partially covered the wording by using Whipped Spackle through the Magenta Square Centred Overlapping Circles stencil. Once dry, I wet the area and added Mango Tango Nuance powder. Once it started to activate, I picked up some colour with a small brush and splattered a bit onto the white areas of the tag. I then, set it aside and let the powder water mix do its thing. After it was thoroughly dried, I used a Sakura Quickie Glue pen to add gold foil to some areas and black acrylic paint splatters. Love the way it turned out. You can still somewhat see the item identifying description through the media but that just adds to the layering.


Next, I stamped the Zen Sunflower Bird onto vellum with Jet Black Archival Ink and coloured it using Zig Clean Color Brush Markers first and then going back in with a fine water brush for a watercolour effect. This was my colouring for Day 6 of Kathy Racoosin's 30 Day Coloring Challenge. After fussy cutting it out, it was too flimsy and did not pop enough off the background so I adhered it to cardstock with Glossy Accents and then fussy cut it again.


Then, I stamped the Give WIngs to Your Passion sentiment with VersaMark on black cardstock and heat embossed it with Simon Says Stamp Fine White embossing powder. I trimmed it down and cut in the ends. Next, I used the Quickie Glue pen on the edge and to create a few splatter spots and adhered some gold foil.


Now the tag was ready to assemble. I glued down a few scrap distressed and die punched flowers, added some gold thread, foam taped the bird and sentiment, tied on some glass bead trim, and lastly, added some black glitter glue to the flower centres. There you have it!


Be sure to check out the Simon Says Stamp Monday Birds of a Feather Challenge here for more feather friendly inspired entries.


TTFN,


Supplies
gold foiled cardstock tag from Indigo/Chapters Cozy Faux Fur Throw, Zen Sunflower Bird stamp, Give Wings to Your Passion stamp, Overlapping Circles stencil, Mango Tango Nuance powder, patterned paper (Magenta), Whipped Spackle (Faber-Castell), Zig Clean Colour Real Brush markers [Cobalt Blue, Pink, Yellow, Orange, Light Green](Kuretake), Quickie glue pen (Sakura), gold foil (Therm-o-Web), VersaMark ink (Tsukineko), Fine White embossing powder (Simon Says Stamp), Jet Black Archival ink, Glossy Accents, Black Soot Acrylic Distress Paint (Ranger), Vellum (The paper Company), black cardstock (Bazzill), white cardstock (CTMH), black glitter glue (Hampton Arts), gold thread and glass bead garland (Dollarama)