Pages

Friday, February 28, 2020

Mandala Birthday


Hello Friends! I am up on the Magenta blog today with this heat embossed and dry debossed mandala birthday card.


I started with a piece of Canson XL watercolour paper and loaded the Mandala 2 mask with VersaMark before running it through my Big Shot die cutting machine. Next, I covered the embossed area with clear emboss powder and heat set it. Then, I watercoloured the various design areas with Mango Tango, Turquoise and Cerulean Blue Nuance powders. While it was drying, I stamped and white heat embossed the Happy Birthday top line from the multilingual Birthday stamp in order to create the sentiment strip. I adhered it with foam tape and then added small jewels to finish off the card.


Supplies: mandala mask, sentiment stamp, Mango Tango, Turquoise and Cerulean Blue Nuance powders (Magenta), VersaMark Ink (Tsukineko), clear and white Fine Embossing powders (Simon Says Stamp), XL watercolour paper (Canson), black cardstock (Bazzill), jewels (Offray) [orange envelope shown made from CTMH cardstock

I created a coordinated envelope using the WRMK Envelope Punch Board with a matching CTMH cardstock which really makes the colours pop. If you liked the mandala used on the card and are into creating with mandalas, be sure to check out the many others in the Magenta collection here.


TTFN,


*****

Magenta products used:
Mango Tango
Nuance - MNU001 - Turquoise
Turquoise
Nuance - MNU011 - Cerulean Blue
Cerulean Blue

Sunday, February 23, 2020

Butterfly Bliss Shabby Shadow Box Frame


Hidy ho crafty friends! Today's creation is a piece of home decor. It is a treat when you find two challenges that mesh beautifully and provide so much wonderful inspiration. Such was the case with this week's Simon Says Stamp Monday Frame It challenge and A Vintage Journey's February Against the Grain challenge.


I created this home decor piece in a shabby style with patterned papers from the pretty KaiserCraft Scrap Studio collection. I cut the Tarnished pattern paper into a 4x6 piece and backed it with up-cycled cereal box board. Next, I stamped the KaiserCraft Sheet Music stamp with Wendy Vecchi Watering Can grey Archival ink in a few places. Then, I spread Faber-Castell Glass Bead Glitter Gel through the KaiserCraft Distressed Dots stencil.


While that was drying, I fussy cut the butterfly from the Course pattern paper and used a Golden Stardust Gelly Roll pen to trace over the butterfly's detail lines. Once that was done, I added Glossy Accents to the body and the two black dots for a little added dimension. I also trimmed off the pattern paper label from a piece of pattern paper from the KaiserCraft Everlasting collection, spritzed it with water, crumpled it and then straightened it somewhat to dry. This gives it a distressed look.


Once the glass bead glitter gel was dry, I added white watercolour paint from my Mijello Mission Gold watercolour set to help accent the distressed dots for added interest and shabbiness. While that was drying, I started to work on the frame. I used a Dollarama wooden paint panel on its back side. I gave it a a very light coat of Liquitex white gesso and then added a thin bit of white Decoart Acrylic paint. I was very light handed and rubbed off paint as I went so to allow the woodgrain and the wood's unfinished roughness to show through. Once it was dry, I cut a piece of Bazzill white woodgrain cardstock to fit the inside and adhered it to the back.


Next, I was back to the focal piece. I tore my prepped pattern strip in two pieces and tacked it down prior to stitching the corners with Darice hemp cord. I adhered a flight trail of hemp cord with Ranger Multi media Matte gel and then the butterfly. Next, I glued down the Dollarama gold glitter wood letters spelling bliss. Then, I used Therm-o-web's Decofoil adhesive pen along the edges and added their gold Decofoil for a distress gilded look. To finish the piece off, I added a piece of cardboard to the back before mounting it in the frame so to give it added dimension and a shadow box effect.


I am really pleased with how this turned out. It was a stroke of luck that these challenges inspired this fun creation. Head on over to the Simon Says Stamp Monday Challenge here and a Vintage Journey: Against the Grain Challenge here to see some gorgeous eye candy inspiration and other participants takes on these challenges.

TTFN,


Sunday, February 16, 2020

Love to Create


Hi crafty friends! 

Today, I have an art journal page to share with you. The theme was inspired by this month's Dina Wakley Media Tribe's All About Love challenge and the product technique use by Simon Says Stamp Monday Crack it Up Challenge.


After using emboss ink through a Donna Downey script stencil and heat embossing with Tim Holtz Faded Jeans and Broken China Distress emboss powders, I coloured the Strathmore 400 Series mix media paper with both Picked Raspberry Distress Stain and Dina Wakley Blackberry Violet Acrylic paint. Once dry, I added the Distress Clear Rock Candy Crackle paint to some areas of my background and set it aside to do its crackle thing. While that was setting up, I covered a rectangular piece of cardstock with Dina Wakley washi tape and then freehand cut out a heart. Next, I adhered the fabric trim and then ran it through the sewing machine to give it a messy stitched look. When the crackle paint was dry, I used a black Stabilo All pencil along the edge and activated it with a waterbrush adding more All pencil to the crackle areas to make them stand out. 


Once that was dry, I glued down the heart, stapled the transparent Tim Holtz letters and adhered the computer generated "to create" cardstock strips.


Head on over to the Simon Says Stamp Monday Challenge blog here to check out the DT's inspirational pieces along with other participant's takes on this week's challenge. 

TTFN,


Sunday, February 9, 2020

Prima Pretties


I had some floral fussy cutting fun with the Prima Apricot Honey patterned papers. Paired with their matching glittery paper blinged out centre flowers results in a layered floral frenzy card.


Supplies: Apricot Honey pattern papers, ephemera pack, flowers (Prima Marketing), Tim Holtz Antique Linen, Brushed Corduroy, Spun Sugar and Worn Lipstick Distress inks (Ranger), Vintage Pink Glimmer Mist (Tattered Angels)


For the first layer, I cut a piece of the Tiny Blossoms pattern paper, spritzed it with water, crinkled it and then unfurled it to dry. Then, I distressed and inked the edges and added splatters of Vintage Pink Glimmer Mist before gluing it down to my card base. From there, I built up layers of fussy cut flowers and foliage from the Tiny Blossoms and Apricot Honey patterned papers along with the floral card from the Happiness Looks Good on You pattern paper which I also distressed and splattered. Next, I cut and distressed the words from the Deep Love paper and adhered them with some cereal box board for added dimension. Lastly, I added two Apricot Honey flowers and a fussy cut butterfly from the collection's ephemera pack.

I am entering this beauty in the Simon Says Stamp Monday Floral Frenzy challenge. Check out their design team's inspirational creations as well as all the other floral entries.


TTFN,


Thursday, January 30, 2020

Magenta Cuddle Buddies


Hi All! I am up on the Magenta blog today with this cute snowy cuddle buddy card.


The background was created with texture paste through the Snowflakes mask on a piece of 140 lb cold press watercolour paper and coloured with Cerulean Blue Nuance powder.  Next, the polar bear and stuffed bear from the Snowy Nights Slumber were stamped on the same type of watercolour paper, coloured with watercolours and then fussy cut once dry. It was adhered to the base with foam tape to pop it up for some dimension. Then, glitter glue was added to accent the ice areas. Lastly, the Life is Better with Friends sentiment was white heat embossed stamped on black cardstock and adhered to the card.


TTFN,


*****


Monday, December 30, 2019

Snow Thanks


With so many seasonal celebrations and get togethers at this time of year, a quick seasonal Thank You card is always de rigueur. Today, I am sharing just such a simple sparkly card over on the Magenta blog.


Supplies: Snowflakes mask and Thank You stamp (Magenta), Tim Holtz Cracked Pistachio Distress Ink (Ranger), Silver Sheer Shimmer Spritz (Imagine Crafts), VersaMark ink (Tsukineko), silver glitter emboss powder (Emerald Creek), Assorted Moonshine sequins (Simon Says Stamp) 


Head on over to the my blog post here to find out how to make it.

TTFN,


*****


Magenta products used:

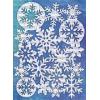
MC05 - Snowflakes
Thank You - Extra Large

Wednesday, October 30, 2019

Leaful Thanks


Hello crafty friends! Today I have a fall themed thank you card that I am sharing over on the Magenta blog.


Supplies: Doodled Leaf stamp, Be Thankful stamp, Autumn Leaves stencil, patterned papers (Magenta), Kraft paper (The Paper Company), Texture Paste, Clear Rock Distress Candy Crackle Paint, Candied Apple and Mustard Stain Distress ink, Sunshine Yellow Alchohol ink, Multi-Medium Matte (Ranger), burlap, muslin and hemp twine (Misc.)


On a 5 x 5 1/2" kraft card base, I stamped the Doodled Leaf with Candied Apple Distress ink. I used a waterbrush to move the colour to fill the leaf and added some red splatters. Once dry, I restamped the leaf to darked the image. On burlap, I stenciled the oak leaf with Texture Paste and on muslin, I stenciled the poplar leaf with Clear Rock Candy Distress Crackle Paint. Once they were dry, I added Mustard Seed Distress ink to the oak leaf and Sunshine Yellow Alcohol ink on the poplar leaf. Then, I fussy cut the bird on a branch from the Last Serenade pattered paper. Next, I heat emboss stamped the Thankful part of the Be Thankful sentiment stamp and add brown marker to create shadows. Then, I wrapped the card with hemp twine and secured it before adhering all the other pieces in layers. 

This was a fun card to make. I love all the textures of this one. Hope you found some inspiration from it today.


TTFN,


*****
Magenta products used:

Friday, October 25, 2019

Creepy Caravan Halloween Blog Crawl


Welcome to the next stop on the Creepy Caravan Blog Hop! Crafty mixed media mavens have been busy fashioning Halloween creations for your seasonal enjoyment and inspiration. Sit back, relax and crawl along with the Creepy Caravan.


Cassandra here, joining in the hop with this "Spells" altered book... great for a seasonal home decor display or a prop for Halloween costumes.


I started by applying black gesso with a paint brush to the jacket of an old hardcover book.


Next, I created patches for some of the really torn areas of the cover using cheesecloth and tissue paper and then applying Clear Rock Candy Distress Crackle Paint to those areas. Once they were dry and crackled, I used Texture Paste through the Constellation stencil from Magenta to add the background stars and constellations. Then, I adhered the stacked cardstock cut outs that I had created using a Silhouette Cameo.


After painting everything with black acrylic paint, I started to apply Prima Finnabair's Art Alchemy waxes with a small brush and at times with my finger to smear it in some spots. I used White Gold Metallic Wax over all the raised areas and then added some Lucky Emerald Antique Brilliance to the tree and Mystic Turquoise Antique Brilliance to the birds.


I replaced the jacket cover onto the book and took a photo with the book laying open in the middle so that the jacket can be seen in its entirety.


Supplies: Black Gesso, Matte Texture Paste, Clear Rock Candy Distress Crackle Paste and Multi Media Matte (Ranger), cheesecloth, tissue paper (misc.), Constellations stencil (Magenta), tree, crows, sun, creseent moon amd letters cut files (Silhouette), cardstock (Staples), Fawndementals Glue (Lawn Fawn), black acrylic paint (DecoArt), Finnabair White Gold Metalique Wax, Lucky Emerald and Mystic Turquoise Antique Brillance Wax (Prima) 


Here is an angled view as part of a Halloween display on my mantle. I hope you enjoyed my altered creation and that I have inspired you to create your own book of spells.


For your next stop on the Creepy Caravan Blog Hop, please head on over to Life in a Snapshot.

If you are just beginning on the Creepy Caravan Blog Hop with your visit here on my blog, below is the full list of all the inspirational talented artists in hop order:


A big thank you goes out to Cathy Frailey (owner of Bleeding Art challenge blog) for organizing this hop. Be sure to visit all the hop stops for some awesome Halloween themed mixed media creations and be sure to leave some love!

*****

I am entering my altered book into the Simon Says Stamp Monday Spooky Challenge. Challenge details and DT creations can be found here.


Happy Halloween!


Sunday, September 22, 2019

Enjoy the Little Things


For this week's Simon Says Monday Monochrome challenge, I created a double sided mixed media bookmark with some new to me KaiserCraft goodies.


While I like both sides, in the end, I really love how the "B" side turned out and it best represents the Monochrome theme. I coloured the background with a combination of Cracked Pistachio Distress Oxide ink and Cracked Pistachio Distress ink. Next, I stamped the KaiserCraft Flutter stamp and then coloured the butterflies with Peacock and Turquoise Dina Wakley Scribble Sticks. Once it was dry, I restamped the image to replace the butterflies' line details. Once that was dry, I black heat embossed stamped "the little things" part of the KaiserCraft Antiquities stamp and splattered a little bit of gold with Gold Sheer Shimmer Spritz. The sewing came after as part of adhering the fabric on the "A" side.


The "A" side was gold stenciled on canvas with the KaiserCraft Distress Dots after the canvas was stitched to the cardstock base along with the strip of KaiserCraft Amore patterned paper. I also punched a circle out and adhered it to the top prior to hole punching as a reinforcer for the Cracked Pistachio and Evergreen Bough Distress Ink coloured seam binding crinkle ribbon. The "Enjoy" was from the same Antiquities stamp which I black heat embossed on vellum and fussy cut out. The butterfly was fussy cut from KaiserCraft Tanished Patterned paper.

Be sure to check out the other wonderful Monochrome creations over at the Simon Says Stamp Monday Challenge site.


TTFN,


Friday, August 30, 2019

Floral Embossed Layers Magenta Card


Hello crafty friends! Today, I am up on the Magenta blog with a floral tent style mixed media card made with textured emboss layers.


I started with black heat emboss stamping the Azalea flower several times on a coffee filter and then colouring it with Aquamarine Nuance powder. While it was drying, I white heat embossed stamped the Leaf Lines leaves on vellum and fussy cut them out. Next, I clear heat embossed stamped the Delicate Feminine Text on a 4 1/2" x 6" white cardstock card base and then blended two green Tim Holtz Distress inks; Twisted Citron as the base with the addition of Mowed Lawn starting at the top and fading the colour as it comes down. Returning to the now dried flowers, I fussy cut them out. Lastly, I wrapped the card with cream hemp string, adhered the leaves and flowers with dimensional clear foam tape and then added a bunch of Simon Says Stamp Assorted Moonshine sequins.

I really like the dimension and textures on this card. I hope you have enjoyed today's card.


TTFN,


*****

Magenta products used:

Azalea
Azalea