
I am up on the Magenta blog today letting crafty peeps know that Magenta is once again a prize sponsor for More Than Words Challenge by sharing a tag inspired by More Than Words May "She" Mini challenge .


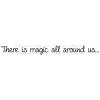
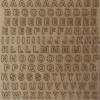
Then, I stamped the "is magic" part of the sentiment on vellum using black archival ink and painted the mini chipboard letters with black. With all the pieces ready, I assembled the tag adding on the wood veneer birdcage and an upcycled metal chain from a clothing tag.
TTFN,

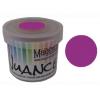
Supplies: Bold Leaf Flourish stamp, Long Flower stamp, There is magic sentiment stamp, Flower and Leaves stencil, Raspberry Nuance powder, birdcage wood veneer, mini alpha chipboard letters (Magenta), kraft tag, texture paste, Jet Archival ink, Tim Holtz Cracked Pistachio Distress Oxide, Tim Holtz Black Soot Distress paint(Ranger), glass bead gel (Golden), VersaMark (Tsukineko), clear fine emboss powder (Simon Says Stamp), XL watercolour paper (Canson), wht cardstock (Canadian Scrapbooker Super Stock), vellum (The Paper Company), jewels (Dollarama), trim (CTMH), chain (misc.)
I started with a kraft tag and stamped the Bold Leaf Flourish stamp using Cracked Pistachio Distress Oxide ink. Next, I inked the edges and wet the ink to activate it. Once dry, I used Glass Bead gel and the Flowers and Leaves stencil. While that was drying, I stamped the Tall Blossom flower image onto 140 lb watercolour paper and heat embossed it with clear embossing powder and then watercoloured painted the flowers using Raspberry Nuance powder. Once the flowers were dry, I fussy cut them all out.

Then, I stamped the "is magic" part of the sentiment on vellum using black archival ink and painted the mini chipboard letters with black. With all the pieces ready, I assembled the tag adding on the wood veneer birdcage and an upcycled metal chain from a clothing tag.


TTFN,


