Pages

Showing posts with label wood. Show all posts

Sunday, January 30, 2022

Spreading Lots of Love


Hello Crafty Friends! Today with a super slimline Valentine card. Valentine's Day is around the corner as we head into February and any reason to spread love is a good thing especially in these ongoing challenging times.


I started with a 3" x 8 1/2" piece of kraft cardstock and using low tack tape like painters tape or a post-it, secure the top two rows of the stencil to the centre left side if you are right handed and the centre right side if you are left handed (that way you are less likely to smudge the ink as it will take a bit to dry but you can continue to work on it. 

First, blend on a good amount of Unicorn White Pigment ink. Reposition to the remaining side and repeat. Be sure to thouroughly dry before blending on the coloured inks. You can set it aside to dry while making multiples or speed up the drying with a heat gun. Be sure to clean and dry the stencil before proceeding to the next step.

Align the heart stencil back over the white stenciled area and slightly offset it to the right to allow a smidgeon of white to show as a highlight and secure it. Then, using a blending brush/tool, start applying colour, I used Worn Lipstick Distress Oxide ink, from the top getting really light as you get towards the bottom to create an ombre effect.

Once the ink is dry, I traced Magenta wood veneer letters with a black fine line marker to add the word LOVE behind the hearts. I added mini sequins to each hearts top left section and wood veneer YOU to finish it off.
 
From my heart to yours.
TTFN,


********
Magenta products used:

TM210 - 15 Hearts Stencil


Sunday, February 23, 2020

Butterfly Bliss Shabby Shadow Box Frame


Hidy ho crafty friends! Today's creation is a piece of home decor. It is a treat when you find two challenges that mesh beautifully and provide so much wonderful inspiration. Such was the case with this week's Simon Says Stamp Monday Frame It challenge and A Vintage Journey's February Against the Grain challenge.


I created this home decor piece in a shabby style with patterned papers from the pretty KaiserCraft Scrap Studio collection. I cut the Tarnished pattern paper into a 4x6 piece and backed it with up-cycled cereal box board. Next, I stamped the KaiserCraft Sheet Music stamp with Wendy Vecchi Watering Can grey Archival ink in a few places. Then, I spread Faber-Castell Glass Bead Glitter Gel through the KaiserCraft Distressed Dots stencil.


While that was drying, I fussy cut the butterfly from the Course pattern paper and used a Golden Stardust Gelly Roll pen to trace over the butterfly's detail lines. Once that was done, I added Glossy Accents to the body and the two black dots for a little added dimension. I also trimmed off the pattern paper label from a piece of pattern paper from the KaiserCraft Everlasting collection, spritzed it with water, crumpled it and then straightened it somewhat to dry. This gives it a distressed look.


Once the glass bead glitter gel was dry, I added white watercolour paint from my Mijello Mission Gold watercolour set to help accent the distressed dots for added interest and shabbiness. While that was drying, I started to work on the frame. I used a Dollarama wooden paint panel on its back side. I gave it a a very light coat of Liquitex white gesso and then added a thin bit of white Decoart Acrylic paint. I was very light handed and rubbed off paint as I went so to allow the woodgrain and the wood's unfinished roughness to show through. Once it was dry, I cut a piece of Bazzill white woodgrain cardstock to fit the inside and adhered it to the back.


Next, I was back to the focal piece. I tore my prepped pattern strip in two pieces and tacked it down prior to stitching the corners with Darice hemp cord. I adhered a flight trail of hemp cord with Ranger Multi media Matte gel and then the butterfly. Next, I glued down the Dollarama gold glitter wood letters spelling bliss. Then, I used Therm-o-web's Decofoil adhesive pen along the edges and added their gold Decofoil for a distress gilded look. To finish the piece off, I added a piece of cardboard to the back before mounting it in the frame so to give it added dimension and a shadow box effect.


I am really pleased with how this turned out. It was a stroke of luck that these challenges inspired this fun creation. Head on over to the Simon Says Stamp Monday Challenge here and a Vintage Journey: Against the Grain Challenge here to see some gorgeous eye candy inspiration and other participants takes on these challenges.

TTFN,


Friday, July 12, 2019

Christmas in July Blog Hop


Welcome to the next stop on the Christmas in July Hop! The crafty mixed media elves have been busy fashioning inspirational seasonal creations. Sit back, relax and curate some crafty Christmas creations. 


Cassandra here, joining in the hop with this mixed media canvas that I created from a variety of upcycled materials (a Shreddies cereal box board, corrugated pizza liner, kraft paper packaging from a purchase at my local scrapbook store, vintage mother of pearl buttons that I purchased at auction years ago, and vintage book paper from a book discarded from the library) along with some dollar store items (the frame, burlap tape, lace, gold glitter wood letters, linen square and vintage themed patterned paper). I also got to rummage through my crafty stash and use up some things that I have had for a while.


To begin, I gathered together a plethora of items that I thought might work for a vintage feel and picked from the pile as I went along. I started by cutting the Shreddies cereal box board into a slightly smaller than a 5" x 7" panel. Then, I gave it a prep coat of gesso. Next, I picked out patterned papers, tissue papers (Tim Holtz and pre-stamped tan coloured tissue- both leftovers from previous projects) and old book paper.


Once I collaged them with Ranger Multi Media Matte gel and let them dry, I scrapped and brushed on some Golden gesso, lightening parts with a baby wipe. Using the gesso, I roughly delineated where the tree would be created.


Once dry, I used a Brown Stabilo All pencil, loosley scribbling around the edges and where there were collage seems. Then, I activated it with a water brush, adding in more as needed until I was happy with the look.


Next, came the trial and error part of building the tree. I tried a bunch of different combinations of pieces and different orders until I settled on this one.


Then, I adhered all the strips into place with either the matte gel or Sookwang Scor-Tape double sided adhesive. At this point, I thought I was done until I tried the panel in the frame and decided, it needed a bit more to the background.


I used a Crafty Individuals Harlequin stamp and a Nougat Stamper's Big Brush Marker to add in some diamond texture with a second generation (stamp off) technique to lighten the brown that transfered.

Here is another look at the finished canvas.


Supplies: patterned paper (K & Company, Nobility), Tim Holtz Ideaology Melange Tissue Wrap (Advantus), bird stamp (CTMH), gesso (Golden), Jet Archival Ink, Multi Medium Matte (Ranger), linen, lace, burlap tape, bordesticker, gold glitter wood letters and frame (Dollarama), Harlequin stamp (Crafty Individuals), Nougat Stamper's Big Brush marker (Faber-Castell), Brown All pencil (Stabilo), Shreddies cereal box board, German book page, tan tissue paper, aluminium foil, vintage mother of pearl buttons, kraft paper bag, corrugated Pizzaville box liner (Misc.)


I can't help but smile at the end result! I love it and look forward to enjoying this Christmas decor for years to come. I hope it brings you some joy too!

For your next stop on the Christmas in July hop, please head on over to Whimsy Chic Paper Crafts.


If you are just beginning on the Christmas in July Hop with your visit here on my blog, below is the full list of all the inspirational talented elves in hop order:


A big thank you goes out to Cathy Frailey (owner of Bleeding Art challenge blog) for organizing this hop. Be sure to visit all the hop stops for some fun Christmas themed mixed media creations and be sure to leave some love!


TTFN,


Wednesday, August 22, 2018

This Smile


It has been a bit since I have made a scrapbook layout. This mixed media one was one that I had started last year and finally got to finishing at Crop and Create Torinto this year.


I started with the Creative Scrapbooker's Superstock base covered with clear gesso prior to watercolouring with Tim Holtz Cracked Pistachio and Stampin' Up's Pretty in Pink, stamping with the CTMH My life is so blessed sentiment stamp and splattering with Tattered Angels Vintage Pink and Tim Holtz Picked Raspberry to match the Maggie Holmes Crate Paper collection. I added lots of textures with a variety of trims, mesh, film strip and wood veneer. I added a hand cut and blanket stiched felt heart too.

It felt really good to make a layout. I really have to get into the habit again of making them on a regular basis.


TTFN,


Supplies: Crate Paper Maggie Holmes patterned paper and overlay, Royal Dear Lizzy Thickers, velvet rickrack (American Crafts), cardstock (Creative Scrapbooker Superstock), clear gesso (Liquitex), inks [Tim Holtz Cracked Pistachio and Picked Raspberry (Ramger), Vintage Pink (Tattered Angels), Pretty in Pink (Stampin' Up)], sentiment stamp and white cardstock (CTMH), Tim Holtz Idea-ology Film Strip (Advantus), mesh (Magenta), crochet trim (Maya Road), wood veneer (Prima), butterfly punch (Martha Stewart), embroidery floss (Loops & Thread), pen (Staedtler), and doily, staples, felt and pink ribbon (Misc). 

Friday, December 15, 2017

Christmas Joy


Today, I have a little Magenta watercolour merriment to bring some joy during the holiday season.


Starting with the Christmas Tree stencil, I used a mini Broken China Distress ink pad and ran it along the outline shape of the tree. I spritzed it with water and then used it like a stamp on a 140 lb piece of watercolour paper. While the colour dried, I cleaned off the stencil and dried it. Next, I lined the stencil up with the tree shape and using three colours of watercolour pencil crayons, I outlined the ball ornament shapes and added more colour to one side of the ball. I repeated the same process with a brown watercolour pencil crayon for the tree trunk. Then using a fine waterbrush, I moved the colour around creating a darker to lighter area and leaving a highlight.


Once dry, I added a shadow outline area with a graphite Stabilo All pencil. Next, on a piece of acetate transparency, I used the Love Letter stamp with Saddle Brown StazOn ink. Then, I stamped the Joy part of the Joy to the World sentiment stamp with Jet Black StazOn ink. Once completely dry. I cut them into three pieces, and adhered them with a gloss gel media. Then, I mixed Delicata Golden Glitz re-inker mixed with texture paste and used the Stars stencil to create the star at the top of the tree. Lastly, I adhered a piece of birch bark to the cardbase prior to adhering the painted panel and added some baker's twine.


*****

Produits Magenta utilisés:
Magenta products used:


TM197 Christmas Tree
TM197

Love Letter
95.017.L

TM180 Stars
TM180
Joy to the World
07.958.H


I hope you enjoyed today's creation. 

TTFN,


Monday, August 28, 2017

Love This Day ATC

This is the second ATC that I made for this week's  Simon Says Stamp Monday Challenge.


I used an emboss resist technique with the oldie but goodie Heidi Swapp Love stamp and then coloured the Ranger watercolour base with Heidi Swapp sprays in Mustard and Pink. A label maker piece for "this day", some wood veneer hearts and doodling finished it off.

Learn more about the current Simon Says Stamp Monday challenge and see the DT inspiration ATCs here.
TTFN,

Monday, May 29, 2017

She is Magic - Magenta Style Tag

I am up on the Magenta blog today letting crafty peeps know that Magenta is once again a prize sponsor for More Than Words Challenge by sharing a tag inspired by More Than Words May "She" Mini challenge .


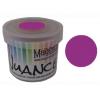
Supplies: Bold Leaf Flourish stamp, Long Flower stamp, There is magic sentiment stamp, Flower and Leaves stencil, Raspberry Nuance powder, birdcage wood veneer, mini alpha chipboard letters (Magenta), kraft tag, texture paste, Jet Archival ink, Tim Holtz Cracked Pistachio Distress Oxide, Tim Holtz Black Soot Distress paint(Ranger), glass bead gel (Golden), VersaMark (Tsukineko), clear fine emboss powder (Simon Says Stamp), XL watercolour paper (Canson), wht cardstock (Canadian Scrapbooker Super Stock), vellum (The Paper Company), jewels (Dollarama), trim (CTMH), chain (misc.)


I started with a kraft tag and stamped the Bold Leaf Flourish stamp using Cracked Pistachio Distress Oxide ink. Next, I inked the edges and wet the ink to activate it. Once dry, I used Glass Bead gel and the Flowers and Leaves stencil. While that was drying, I stamped the Tall Blossom flower image onto 140 lb watercolour paper and heat embossed it with clear embossing powder and then watercoloured painted the flowers using Raspberry Nuance powder. Once the flowers were dry, I fussy cut them all out.


Then, I stamped the "is magic" part of the sentiment on vellum using black archival ink and painted the mini chipboard letters with black. With all the pieces ready, I assembled the tag adding on the wood veneer birdcage and an upcycled metal chain from a clothing tag.


There is magic all around us
07.807.I

CB638 - Mini Alphabet
CB638

KDL20 - Birds & Cages
KDL20

And there you have it! One last look on a different background.


Be sure to check out the challenge details and prizes here:


TTFN,

Wednesday, June 22, 2016

Anything But Paper - Emerald Creek Dare


I am not only excited to be sharing my first project for Emerald Creek as part of the Design Team but also because I am so stoked about the birch bark bookmarks that I made for this dare. More specifically, these beauties will be used as magazine markers. 

The idea for a magazine marker was born out of my love of Flow Magazine for Paper Lovers. If you too are a fan of such a specialty magazine, then you might feel the same way as I do about needing a bookmark as a placeholder versus dog earring a corner of one of these lovelies... it just feels so wrong to do the latter.


The current Emerald Creek Dare is Anything But Paper. I have to say that I really loved the challenge of creating these bookmarks, which are traditionally made from paper, without paper and the experimentation required to figure out what worked with the base medium. 

To begin, I used a piece of birch bark that I had saved from a storm damaged fallen tree. To prep the base, I cut it into a 3 inch width and as it was too thick to lay flat, I peeled it in half (approx. 3 layers) to create two strips. Then, I cut them at two slightly different lengths just for the sake of trying two sizes. I chose to leave the natural tear part at the bottom and make all cuts from the top portion. Next, I used a baby wipe to remove the natural powdery residue from both sides of the birch strips. Lastly, I angle cut the corners and used a regular hand held office supply hole punch to make the hole. Now they were ready for some creative play.

For the first one on the left, I wanted to give stains a try. These are the supplies that I used on it. 


I started by heat emboss stamping with the Kimilese stamp and Vegas Gold Embossing Powder . Next, I sprayed Twisted Citron, Cracked Pistachio, and Broken China Distress Stains on it and then dried and heat set it with a heat gun (being careful not to get too close to the bark with the heat as it can cause the birch to blister). I placed it under a heavy stack of books to cool, dry further, and flatten. Once it was completely dry, I used the MISTI stamping tool to align the Cherry Blossom Branch stamp from the NWD Fallen Blossom stamp set where I wanted it to appear on the bookmark. Then, I inked up the branch portion of the stamp with Ranger Coffee Archival ink removing the ink from unwanted areas with a baby wipe prior to stamping it on the bark. Next, I heat set the ink with the heat gun and then let it air dry a bit longer. 


While that was happening, I cleaned the stamp with it still adhered to the MISTI using a baby wipe. Next, I inked up the blossoms with emboss ink, re-stamped the image, and heat embossed it with Sweet Valentine Embossing Powder. Once cool, I stamped my craft mat with Picket Fence Distress ink and used a water brush adding the white to the inside of the blossoms. While that was air drying, I coloured the Tim Holtz Crinkle Ribbon with Antique Linen Distress Stain and stamped the Small Butterfly on a cut off piece of birch bark with Peacock Feathers Distress Ink and heat embossed it with the Iridescent Shimmer Embossing Powder. Lastly, I stamped the "Remember to make memories" sentiment also from the NWD Fallen Blossom stamp set with the Coffee Archival ink, adhered the fussy cut butterfly, and tied on the ribbon.


For the second bookmark on the right...


I followed much of the same process with the following alterations:


- I did the initial heat emboss resist technique using the Kimilese stamp with Burnt Copper Leaves Embossing Powder prior to painting it with a combination of Broken China, Peacock Feathers, Cracked Pistachio, and Twisted Citron Distress Paint. After letting the paint "set up" a bit, I carefully lightly buffed parts of the embossed sections with a piece of paper towel to remove some of the paint and reveal the embossed script.

- I heat emboss stamped the Small Butterfly stamp using emboss ink twice on the small piece of leftover birch bark and heat embossed one with Vegas Gold Embossing Powder and the other with Iridescent Shimmer Embossing Powder prior to fussy cutting them both out.

- I heat emboss stamped the "Remember to make memories" sentiment from the NWD Fallen Blossom stamp set with fine white embossing powder.

- I used three pieces of jute twine to tie the top and knotted the ends.


Here is a look at the supplies that I used for this bookmark.


To see my fellow "Dare"mates takes on the challenge and get the challenge details, check out the Emerald Creek blog here. Kim is offering an added bonus prize for further incentive to this Dare so it is a perfect time to grab your imagination, get creative, and come join us.

If you make your own birch bark bookmarks using either method, be sure to share a link with me here on the blog or tag me @scrapsavvy on Instagram. I would love to see your take.
  

TTFN,

Emerald Creek Products used:

Other products used and available from the EC shop:
Distress Stains: Twisted Citron, Cracked Pistachio, Broken China, Antique Linen
Distress Paints: Broken China, Peacock Feathers, Cracked Pistachio, Twisted Citron
Distress Ink: Picket Fence, Peacock Feathers
Ranger: Emboss Ink

Monday, February 22, 2016

4 Amigas

This weekend I did some crafty organizing and rediscovered a partially made layout using a My Creative Scrapbook kit featuring Simple Stories Daily Grind collection. No time like the present, I got it done.


Supplies: patterned papers, die cuts, chipboard (Simple Stories), cork letters (CTMH), ribbon and tag (Misc.), wood veneer (Studio Calico), Baker's Twine (Maya Road), watercolour paints (Daler-Rowney)

I mixed up some watercolour paints to match the blue on the paper and added some splatters to the background. I had fun using lots of little bits from the chipboard pack.

I still have lots of this kit left so I will have to make a few more projects with it.

TTFN,