Pages

Showing posts with label More than Words. Show all posts

Sunday, August 26, 2018

Going Old School


Hi creative friends! Today, I made a tag to play along with Simon Says Stamp's Back to School Monday challenge and More Than Words Mini Challenge - Old.

I love old things! I love century homes, antiques and old school items, hence the old Canadian Speller that I used as a photo prop. It was a natural fit to dig into my Tim Holtz stash and gather a bunch of items that fit the bill.


Spray Stain, texture paste, Distress inking and distresssing, all age the newer pieces to match the aged image pieces from a variety of Tim Holtz ephemera packs. I used a circle cut from an old dictionary to create the reinforcer for my improvised tag made from the pocket card matted on a distress kraft backing. The "going old school" sentiment was created on my computer using a typewriter font and the crinkle ribbon was custom coloured with Antique Linen and Vintage Photo spray stains.


I had math, language arts and science covered but I hemmed and hawed about the addition of the fleur de lis (representing french language learning) charm. I was challenged with whether with it, it reduced the white space area and drew the eye. Here is the version with the charm. 


With or without the charm... which do you like best?

Be sure to pop on over to the two blogs to see some wonderful inspiration from their designers as well as fellow entrants.


TTFN,

Supplies: Tim Holtz Broken China, Antique Linen and Vintage Photo Distress Spray Stain, Vintage Photo Distress ink, Texture paste, multi medium matte (Ranger), Cargo Layering Stencil (Stampers Anonymous), Tim Holtz 3 1/4 x 6 1/4 sized pocket card, Thrift Shop and Emporium ephemera pieces, pen nib, quote chip, fleur de lis adornment, jump ring, Crinkle Ribbon (Advantus), kraft paper (CTHM), dictionary page, white cardstock and typerwriter font (Misc.)

Saturday, December 30, 2017

Winter Magic


Today, I am up on the Magenta blog with a simple wintery magic card. It has been so frigid, where I live of late, that my card was inspired by the beautiful effect of frosted snow crystals creeping up the corner of the window pane in my craft room.


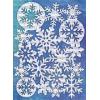
Supplies: Snowflakes mask, magic sentiment and Cerulean Blue Nuance powder (Magenta), texture paste, watercolour paper, Jet Black Archival ink (Ranger), Sparkle Sheer Shimmer Spritz (Imagine Crafts), vellum (The Paper Company)


While it is hard to see in the photo, I just love the beautiful sparkle effect of the Imagine Crafts Sparkle Sheer Shimmer Spritz on top of the texture paste. Pure magic!


If you would like to learn how to make this card, a simple step-by-step can be found by visiting the Magenta blog here.

I am entering this card into the More Than Words December "Us" Mini Challenge. Details on the challenge can be found here.


Wherever you are this holiday season, I hope you are enjoying some wintery magic!

TTFN,

*****

Magenta products used:

Monday, May 29, 2017

She is Magic - Magenta Style Tag

I am up on the Magenta blog today letting crafty peeps know that Magenta is once again a prize sponsor for More Than Words Challenge by sharing a tag inspired by More Than Words May "She" Mini challenge .


Supplies: Bold Leaf Flourish stamp, Long Flower stamp, There is magic sentiment stamp, Flower and Leaves stencil, Raspberry Nuance powder, birdcage wood veneer, mini alpha chipboard letters (Magenta), kraft tag, texture paste, Jet Archival ink, Tim Holtz Cracked Pistachio Distress Oxide, Tim Holtz Black Soot Distress paint(Ranger), glass bead gel (Golden), VersaMark (Tsukineko), clear fine emboss powder (Simon Says Stamp), XL watercolour paper (Canson), wht cardstock (Canadian Scrapbooker Super Stock), vellum (The Paper Company), jewels (Dollarama), trim (CTMH), chain (misc.)


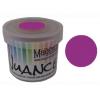
I started with a kraft tag and stamped the Bold Leaf Flourish stamp using Cracked Pistachio Distress Oxide ink. Next, I inked the edges and wet the ink to activate it. Once dry, I used Glass Bead gel and the Flowers and Leaves stencil. While that was drying, I stamped the Tall Blossom flower image onto 140 lb watercolour paper and heat embossed it with clear embossing powder and then watercoloured painted the flowers using Raspberry Nuance powder. Once the flowers were dry, I fussy cut them all out.


Then, I stamped the "is magic" part of the sentiment on vellum using black archival ink and painted the mini chipboard letters with black. With all the pieces ready, I assembled the tag adding on the wood veneer birdcage and an upcycled metal chain from a clothing tag.


There is magic all around us
07.807.I

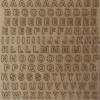
CB638 - Mini Alphabet
CB638

KDL20 - Birds & Cages
KDL20

And there you have it! One last look on a different background.


Be sure to check out the challenge details and prizes here:


TTFN,


Tuesday, March 21, 2017

Beautiful Butterflies

Magenta is a prize sponsor for More Than Words March Challenge.
This month, the word inspiration is "Beautiful" and the creative challenge is "Butterflies".


Supplies: 400 Series cold pressed watercolour paper (Strathmore), Azalea, Butterfly, Leaves of Joy, Script & Post and Life is Beautiful stamps and Purple and Grey Nuance powders (Magenta), Jet Black Archival Ink, VersaMark Ink (Tsukineko), Silver embossing powder (Emerald Creek), coffee filters (Loblaw NoName), Vellum (Dollarama), labeller (Brother)
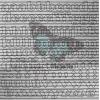


I started with 140 lb coldpress watercolour paper and heat embossed the Script and Postmark stamped areas with silver. Next, I wet the area that I wished to colour and then watercolour painted with the Purple Nuance. Once dry, I stamped the Leaves of Joy stamp in 3 areas using Black Archival ink and splattered some of the remaining Purple Nuance onto the layout. While that was drying, I stamped the Azalea image with the Archival ink and then watercoloured painted the flowers again using the Purple Nuance. While that was drying, I heat embossed stamped the Butterflies onto coffee filter paper using silver glitter emboss and then watercoloured one with the Grey Nuance powder. Once the flowers and butterflies were dry, I fussy cut them all out. I heat embossed stamped the Life is Beautiful sentiment on vellum using black embossing powder and edged it in black ink. With all the pieces ready, I assembled the layout.

I really like the monochromatic look of this one. Be sure to check out all the inspirational creations over at More Than Words.


TTFN,


Tuesday, August 30, 2016

Circle of Friends


I think another title for this post could be Easy and Detailed, you know like those articles that you see in magazines. It was not my original intention to do this. Over the years on my blog, I had done some posts about doing "Add-to"s where I might add an item or two to make something work that was bothering me on a layout well after I had declared it done and posted. With this page, it was more than a simple "Add-to". It all started with inspiration from the More Than Words August main challenge.


I had initially sketched and created this simpler 'Easier' version and at the time when I finished it, I liked it.


I don't know about you but I do not put my newest made pages straight away in an album, rather I display them in my scraproom.  So this is how it came about that as I would enter my scraproom over the next day I thought... umm, it needs more... it needs some black on the circles.  I had debated about inking the edges but that was not practical at that point as they were already adhered to the background so instead I faux stitched them with a pencil. This required the removal of the photos and titling which is where dental floss comes in handy. ;)


Then, I was thinking that it needed a bit more colour added to the border areas. Once that was done, I was thinking that I would draw in more of the red, by adding red paint to the corrugated, chipboard, and cork title letters. However, after I did that, I didn't care for it so I painted them black.


Yet, it still needed something more for the red, so I decided to Archival ink stamp the large Asian flower on patterned paper. Then, I misted, scrunched them, and air dried them. Once dry, I flattened out the shapes a bit, sanded them, and the fussy cut them out, prior to putting some black glitter glue as the centres. I tucked them under the photos helping to create a second visual triangle on the layout and I was pleased by the results.


However, I still had a nagging sense that something was off about the balance of the layout. I solved it with the journaling lines. They help draw your eyes down the page to an end point. Now I feel a sense of rightness and completion with the 'Detailed' version.


Supplies: patterned papers, small and large Asian Bubble Flower stamps, Flowers mask, corrugated letters, chipboard letters, cork letters (Magenta), Tim Holtz Distress inks [Wild Honey, Dried Marigold, Barn Door], Distress Paints [Evergreen Bough, Barn Door, Candied Apple, Black Soot], Black Archival ink (Ranger), Cloudy Sky and Black StazOn (Tsukineko), glitter glue (Hampton Art), pen (CTMH), Sketchy Circles Silhouette cut file (SCT)


Now I know that there are those that will like the easy version over the detailed one and vice versa. That is one of the many beauties of art, it is in the eye of the beholder both as one experiencing it as the viewer or just knowing when it feels done and right for you as the artist creating it.

Magenta is once again the challenge comment sponsor so head on over to the More Than Words Challenge to see the beautiful inspirations by their DT, leave a lovely comment for a chance to win a $25.00 Magenta Gift Certificate, and see the lovely creations of fellow entrants.

TTFN,


Magenta products used:
ME076 Tangerine Odyssey - 10 sheets
Tangerine Odyssey Patterned Paper ME076

Monday, July 25, 2016

A Smile is Contagious - Magenta + More Than Words

Did you know that Magenta is a sponsor over at More than Words this month? They are providing a $25 US gift certificate to the Magenta Online Boutique to one lucky commenter. Yes, that is correct... all you have to do is check out the More than Words challenge for this month and leave a comment to be in the running to win!

The July challenge has very versatile sketch and the prompt is Smile. I flipped the orientation to the right for my Magenta Style art journal take of it which is up on the Magenta blog today. 


Supplies: 8 1/2" x 11" 400 Series Watercolour journal (Strathmore), Golden Yellow and Orange Nuances, Smile sentiment stamp, Bubbles stamp, Butterfly stamp, Constellations stencil, Blossoms mask, patterned paper (Magenta), clear emboss powder (Simon Says Stamp), Tangerine glitter emboss powder (Emerald Creek), Tim Holtz Spiced Marmalade Distress ink, black Archival ink (Ranger) Cloudy Sky StazOn (Tsukineko), whipped spackle (Faber-Castell), label maker (KandCompany)


I chose items to incorporate into my journal page that I relate to a smile... bubbles that erupt like a smile that builds and bursts out and are so much fun, a galaxy of stars and constellations for the endless shine and joy that a smile can bring, flowers for a smile blooming and sending out sweetness, and sparkly butterflies cause I love them and they spread around their joy wherever they go, plus the cheeriness of orange and yellow that warm you up inside just like the feeling evoked from being on the receiving end of a radiant smile.


I started by clear emboss stamping with the Magenta Smile sentiment and then, wetting the watercolour paper background of my Strathmore 400 Series 8 1/2" x 11" journal with water. Next, I applied Golden Yellow and Orange Nuance and I continued to add colour with a smooshing technique using plastic. Once I was happy with the colour, I attempted to stamp with the Magenta Bubbles stamp with the wet Nuance on the page but then elected to wait for the page to dry and then, I used Tim Holtz Spiced Marmalade Distress ink for a clearer image. Next, I stamped Smile some more in Black Archival ink and then stenciled the star Constellation Stencil with Cloudy Sky StazOn. 


I used Whipped Spackle on the Blossoms mask and while it was drying, I heat embossed my favourite Magenta Butterfly stamp on yellow damask patterned paper with Tangerine glitter emboss powder three times and then fussy cut them out. I purposefully had taken a self portrait photo of my mouth smiling, printed it out in Black and White, and then tore it to just the smile dimensions. Once, I adhered it to the page, the title labels and butterflies were the remaining items to be added.


Be sure to head on over to the More than Words July Main Challenge post here to see all the beautiful creations by their DT and comment for a chance to win the Magenta gift certificate.

TTFN,