Pages

Friday, December 15, 2017

Christmas Joy


Today, I have a little Magenta watercolour merriment to bring some joy during the holiday season.


Starting with the Christmas Tree stencil, I used a mini Broken China Distress ink pad and ran it along the outline shape of the tree. I spritzed it with water and then used it like a stamp on a 140 lb piece of watercolour paper. While the colour dried, I cleaned off the stencil and dried it. Next, I lined the stencil up with the tree shape and using three colours of watercolour pencil crayons, I outlined the ball ornament shapes and added more colour to one side of the ball. I repeated the same process with a brown watercolour pencil crayon for the tree trunk. Then using a fine waterbrush, I moved the colour around creating a darker to lighter area and leaving a highlight.


Once dry, I added a shadow outline area with a graphite Stabilo All pencil. Next, on a piece of acetate transparency, I used the Love Letter stamp with Saddle Brown StazOn ink. Then, I stamped the Joy part of the Joy to the World sentiment stamp with Jet Black StazOn ink. Once completely dry. I cut them into three pieces, and adhered them with a gloss gel media. Then, I mixed Delicata Golden Glitz re-inker mixed with texture paste and used the Stars stencil to create the star at the top of the tree. Lastly, I adhered a piece of birch bark to the cardbase prior to adhering the painted panel and added some baker's twine.


*****

Produits Magenta utilisés:
Magenta products used:


TM197 Christmas Tree
TM197

Love Letter
95.017.L

TM180 Stars
TM180
Joy to the World
07.958.H


I hope you enjoyed today's creation. 

TTFN,


Saturday, December 2, 2017

We Are Like Snowflakes


For this month's EC Anything Goes Dare, I was inspired by the crisp whites, cool blues, and shimmery tones of iridescent and silver sparkle that all come with a fresh snowfall creating a magical winter wonderland.


To begin, I stamped the Snowflake stamp using VersaMark numerous times across the bottom of my 4 3/4 x 6" white cardstock card base and then heat embossed with Silver Sparkle emboss powder creating a border. 


Next, I stamped both Flakee and Elegant Flake multiple times with Unicorn Hero Arts Hues pigment ink and then heat embossed some with Iridescent Shimmer and some with Soft Fallen Snow on the 4x6 Wild Whispers card. I fussy cut out a snowflake from a 4x3" Wild Whisper card as well as cutting out and ticket corner punching the sentiment from another 4x3" Wild Whisper card in this collection.


Once all the components were prepared, I was ready to assemble by glueing down the stamp embossed card to the base, adhering the sentiment with foam tape and then using glue dots to mount the metal ring clipped Victorian Snowflake Charm and Mini Victorian Snowflake Charms. Beautiful shimmer, texture and dimension, this is a great multi-occasion seasonal card. 


Check out the Emerald Creek Dares blog for more details on the December Anything Goes Challenge for a chance to win a $50 EC Gift Certificate.

Hope you have fun creating this Holiday Season!


Emerald Creek Craft Supplies Used:


TTFN,


Tuesday, November 28, 2017

Deck the Halls


I'm on the Magenta blog sharing this distressed foiled card. I must say, I seem to have a thing for the bling of glittery foil so far this season in my card making. I paired the foiling up with some glitter emboss and added a bit of sanded distress to it to go with the rustic appeal of the kraft cardstock.


I started with a 4 1/4 " square piece of cardstock which I applied Decofoil heat transfer gel with the new release Star stencil. I set it aside for about an hour to dry.


While the star was drying, I cut a 5 1/2" square piece of kraft cardstock and using a stamp positioning platform, I stamped the Deck the Halls stamp with Versamark ink. The stamp set up for this is really quick and easy as you only have to position the stamp twice; once at the top left, and once at the top right. Once you have set a position, you simply rotate the square each time after stamping thus, four rotations for the left position and then I heat embossed it. Placed it back in and positioned for the right top side, and repeated by stamping and rotating four times and then heat embossed that set. Next, I adhered it to a card base.


Newly foiled star on the left and one with the dried transfer gel on the right.


Then, I went back to the now dried star, placed it in a piece of folded parchment paper and placed that sandwich on a thin piece of chipboard to run it through my laminating machine (you could also use an iron). Next, I peeled away the foil sheet and revealed the foiled surface. Then, I decided to give is some buffing with sandpaper to distress it before adhering it with foam tape on my base.

And there you have it...


I am really pleased with how this one turned out. If you give the heat transfer foil technique a try, be sure to share it either in the Magenta Facebook fan group or on Instagram. I would love to see what you create.


TTFN,

Magenta products used:

TM228 - Star
TM228
Link to boutique

Saturday, November 18, 2017

Shiny & Bright


Using the new Magenta All Over Stars background mask, I made a shiny and bright card for the upcoming holiday season to share with readers which is up on the Magenta blog here with step-by-step tutorial details.


*****
Magenta products used:


TTFN,


Sunday, October 22, 2017

Magenta Mirrored Bird Thanks Card

I am up on the Magenta blog sharing a card that was created using a reversed image or mirror image of a stamp.


I try to get the most out of my craft supplies so after using pastes, paints, or gels on a project, I will put the leftovers onto a 4x6 index card or two. Such was the case for the start of this card's background. Full step-by-step how-to details can be found on the Magenta blog here.

*****

Magenta products used:

TTFN,


Sunday, October 8, 2017

Beware


A little spooktacular Halloween fun with this Beware card for this month's Emerald Creek DareIt's glitzy grunge with a little doodle to ward off the weary for some Emerald Creek Dares Freaky Fun!


After inking a piece of cardstock paper with Distress inks, I stamped it using the Kimilese stamp and then grunged it up with some black ink edge distressing. Next, I cut out the cat and sentiment. I embossed the cat with Oil Rubbed Bronze embossing powder. I embossed the sentiment with Violet Fuschia Sparkle embossing powder along with a border edge area on the card base. Then, I adhered the cardstock to the base, the cat to the background and the sentiment onto the cat. Using a black Zig pen, I doodled the spider.

For details on how to enter for a chance to win $50 worth of Emerald Creek Craft Supplies Products, check out the Dare blog here.


TTFN,


Emerald Creek Supplies Used:


Friday, October 6, 2017

Simple Seasonal Card

I am up on the Magenta blog with this simple yet effective seasonal card.


I created two slightly different colour variations of the card but both start out the same. 


On a 5 1/2 x 4 1/4 natural paper coloured cardstock card base, I stamped the large Autumn Oak Leaf stamp using Wild Honey Distress ink and slightly spritzed it with water to activate the ink in some areas allowing for some variation in colour. Next, I splattered the card with some of the ink left on my craft mat mixed with water. Once dry, I stamped the Carpe Diem sentiment with a combination of StazOn Saddle Brown ink and Gold Delicata ink making one darker and one lighter. Next, I splattered some Gold Sheer Shimmer Spritz on each and once dry, I inked the edges of the darker one with Vintage Photo Distress ink and the lighter one with Gold Delicata ink.

Such a simple yet effective card.
    

Magenta products used:
Produits Magenta utilisés:


TTFN,

Monday, September 25, 2017

Falling For Fall

Well, with 40 degree celsius weather here in central Ontario, it certainly doesn't feel fallish today, however the leaves are beginning to show the season as they are starting their colour change with the increasingly shorter daylight hours.


Inspired by some of the best parts of the season... clear blue skies and the beautiful colours of falling leaves, I am sharing this Magenta card that is up on the Magenta Blog.


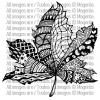
I started with a 5"x7"140 lb cold press watercolour paper and clear heat emboss stamped the Zen Maple Leaf in a patterned design. Next, I watercoloured the leaves with combinations of Golden Yellow, Orange, and Red Nuance powders. Once dry, I watercolured the background in between the leaves with a very watered down Turquoise Nuance powder solution and then added depth of colour with some touches of Aquamarine using a wet-on-wet technique. Then, I white heat emboss stamped the Life is Beautiful sentiment on a chipboard tag and attached it to the panel with twine. Lastly, I adhered the completed panel to a card base.

TTFN,

Thursday, September 21, 2017

Mini Album Makers Challenge Guest Designer

There is a new challenge blog out there created by the talented Autumn Clark of SewPaperPaint for mini album makers and I have the pleasure of sharing a mini album tutorial as a Guest Designer there today.


I am sharing a step-by-step how-to make 3" x 4" mini multi-surfaced hand stitched book. Head on over to their blog here to find the instructions.

Here is a collage of how the various surfaces of the mini were used.


Enter this month's mini album challenge for a chance to win an awesome Seth Apter prize pack. Details can be found in their blog launch post here.


TTFN,