Pages

Sunday, October 8, 2017

Beware


A little spooktacular Halloween fun with this Beware card for this month's Emerald Creek Dare. It's glitzy grunge with a little doodle to ward off the weary for some Emerald Creek Dares Freaky Fun!


After inking a piece of cardstock paper with Distress inks, I stamped it using the Kimilese stamp and then grunged it up with some black ink edge distressing. Next, I cut out the cat and sentiment. I embossed the cat with Oil Rubbed Bronze embossing powder. I embossed the sentiment with Violet Fuschia Sparkle embossing powder along with a border edge area on the card base. Then, I adhered the cardstock to the base, the cat to the background and the sentiment onto the cat. Using a black Zig pen, I doodled the spider.

For details on how to enter for a chance to win $50 worth of Emerald Creek Craft Supplies Products, check out the Dare blog here.


TTFN,


Emerald Creek Supplies Used:


Friday, October 6, 2017

Simple Seasonal Card

I am up on the Magenta blog with this simple yet effective seasonal card.


I created two slightly different colour variations of the card but both start out the same. 


On a 5 1/2 x 4 1/4 natural paper coloured cardstock card base, I stamped the large Autumn Oak Leaf stamp using Wild Honey Distress ink and slightly spritzed it with water to activate the ink in some areas allowing for some variation in colour. Next, I splattered the card with some of the ink left on my craft mat mixed with water. Once dry, I stamped the Carpe Diem sentiment with a combination of StazOn Saddle Brown ink and Gold Delicata ink making one darker and one lighter. Next, I splattered some Gold Sheer Shimmer Spritz on each and once dry, I inked the edges of the darker one with Vintage Photo Distress ink and the lighter one with Gold Delicata ink.

Such a simple yet effective card.
    

Magenta products used:
Produits Magenta utilisés:


TTFN,


Monday, September 25, 2017

Falling For Fall

Well, with 40 degree celsius weather here in central Ontario, it certainly doesn't feel fallish today, however the leaves are beginning to show the season as they are starting their colour change with the increasingly shorter daylight hours.


Inspired by some of the best parts of the season... clear blue skies and the beautiful colours of falling leaves, I am sharing this Magenta card that is up on the Magenta Blog.


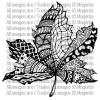
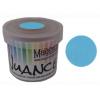
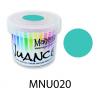
I started with a 5"x7"140 lb cold press watercolour paper and clear heat emboss stamped the Zen Maple Leaf in a patterned design. Next, I watercoloured the leaves with combinations of Golden Yellow, Orange, and Red Nuance powders. Once dry, I watercolured the background in between the leaves with a very watered down Turquoise Nuance powder solution and then added depth of colour with some touches of Aquamarine using a wet-on-wet technique. Then, I white heat emboss stamped the Life is Beautiful sentiment on a chipboard tag and attached it to the panel with twine. Lastly, I adhered the completed panel to a card base.

TTFN,

Thursday, September 21, 2017

Mini Album Makers Challenge Guest Designer

There is a new challenge blog out there created by the talented Autumn Clark of SewPaperPaint for mini album makers and I have the pleasure of sharing a mini album tutorial as a Guest Designer there today.


I am sharing a step-by-step how-to make 3" x 4" mini multi-surfaced hand stitched book. Head on over to their blog here to find the instructions.

Here is a collage of how the various surfaces of the mini were used.


Enter this month's mini album challenge for a chance to win an awesome Seth Apter prize pack. Details can be found in their blog launch post here.


TTFN,


Sunday, September 17, 2017

Sending Sunshine


Wanting to send a pick me up card for a friend, I created this Magenta watercolour floral card to send some sunshine her way.


Visit the Magenta blog here to find how-to make and close up details.


TTFN,


Magenta products used:

Monday, September 4, 2017

Index Card Experimentation

I often reach for an index card when I am trying out a new technique. They are versatile and durable, standing up to a lot of moisture, handling, and layers. They come pre-cut in 3"x5" or 4"x6" sizes and if I like my experimentation piece, they make a great greeting card size.

Today, I am sharing a greeting card that evolved in such a manner from index card experimentation.

I started by scraping gesso onto the blank side of a 4"x6" index card, leaving many small areas bare. Once dry, I used a Graphite Stabilo All pencil around the edges and activated it with a wet brush. Leaving some areas bare allows colour to saturate the paper giving it a grungy aged look.  Once that was dry, I used texture paste through the Flower Silhouette stencil to add two flower images. 


Supplies: Flower Silhouette stencil, Laces stencil, Script and Postage stamp, Sending Hugs stamp (Magenta), Dina Wakley Blackberry and Black Scribble Sticks, Sterling and Black Dina Wakley Acrylic paint, Black Archival ink, fine Black embossing powder, and Texture Paste (Ranger), gesso (Golden), Graphite and Black Stabilo All pencils (Stabilo), index card (Staples)


Once the paste was dry, using a Blackberry Dina Wakley Scribble Stick, I added colour all around the flower edges and then activated it and dissolved it out with a water brush allowing the colour to fade as it moves away from the flowers. Once, that was dry, I placed the stencil back over the flowers and stamped the raised flowers with black Archival ink and the Script and Postmark stamp. Next, I edged the flowers with a Black Stabilo All pencil and activated it with water. 


Then, I sponged silver paint through the Laces stencil and once it was dry, I added depth with a Graphite Stabilo All. Next, I scraped a touch of gesso over the stencil painted sections to age and blend them. I added some splatters of watered down black acrylic paint and because I was thrilled with how the index card experimenting turned out, I added the Sending Hugs sentiment by heat emboss stamping and adhered it to a card base. A little black Stabilo All edging and it was done.


TTFN,

Magenta products used:

Monday, August 28, 2017

Turn Your Can'ts Into Cans ATC


The third ATC that I made for this week's Simon Says Stamp Monday Challenge is chock full of techniques and layering. This one is actually a reworking of one with the same stamped sentiment that I previously did not like how it turned out.


So I stripped it down to the base and covered the background by scrapping gesso on it to hide the previous background and prep the surface. I then, painted it with Dina Wakley Tangerine Heavy Body acrylic and once dry, I stenciled it with the Magenta Quatrefoil stencil with gesso. I stamped the Magenta sentiment with Tim Holtz Black Soot Archival ink and then covered it with clear fine embossing powder and heat set it. Next, I adhered the mesh with gel medium and then splattered the base in Black acrylic paint and with a white poster marker. Once dry, I assembled the ATC from little bits that I both reused from the original project as well as some leftover little pieces from my past creations. Besides the mesh, I reused the punched butterfly and sequins from the original project. From previous projects I used the muslin glass bead gel stenciled flowers that I fussy cut out and and the silhouette cut foliage which I coloured with Cracked Pistachio Distress ink to match the mesh and .

Learn more about the current Simon Says Stamp Monday challenge and see the DT inspiration ATCs here.

TTFN,


Love This Day ATC

This is the second ATC that I made for this week's  Simon Says Stamp Monday Challenge.


I used an emboss resist technique with the oldie but goodie Heidi Swapp Love stamp and then coloured the Ranger watercolour base with Heidi Swapp sprays in Mustard and Pink. A label maker piece for "this day", some wood veneer hearts and doodling finished it off.

Learn more about the current Simon Says Stamp Monday challenge and see the DT inspiration ATCs here.
TTFN,


Coffee Filter Flowers


Hi crafty friends! I am over on the Magenta blog today, sharing one of my favourite flower techniques that I taught at Creativation this year. Using coffee filters to make light, airy, and easily shaped flowers is far more forgiving than using tissue paper and perfect for novice to intermediate crafters alike. Colouring them with Nuance powder gives a beautiful intense watercoloured effect. I used my finished fussy cut flowers on this Feel Better Soon watercolour card.


For step-by-step instructions on how to make the flowers and this card, head over to the Magenta Blog here.


TTFN,

Magenta products used:

Feel better soon
07.967.G

Sunday, August 27, 2017

Bloom ATC

I decided to make a few ATCs for this week's Simon Says Stamp Monday Challenge. On the first one I am sharing,  I used the same technique that I used on the front cover of the notebook that I made for this month's Emerald Creek Dare DT inspiration piece.


Supplies: Kimilese Script stamp, Spider Chrysanthemum Stamp, Clear Fine Embossing Powder (Emerald Creek Craft Supplies), Tim Holtz Tumbled Glass, Picked Raspberry, Mowed Lawn Distress inks, Coffee Archival ink (Ranger), VersaMark ink and Black StazOn (Tsukineko), 400 Series cold press watercolour paper (Strathmore)


This time I gave it a blue background using Tumbled Glass Distress ink. Once I did the embossing part, I watercoloured the flower and stem with Picked Raspberry and Mowed Lawn Distress inks. I finished it off with Tim Holtz Idea-ology letter stickers and inked the edges.

To learn how to do the three layer emboss resist technique, check out this post. Learn more about the current Simon Says Stamp Monday challenge and see the DT inspiration ATCs here.

TTFN,