Pages

Sunday, July 29, 2018

Stencilled Background Watercolour Card


Hello friends! Like everyone, I like to get more out of my crafting supplies, and today's Magenta card does just that as the textured background was created using a stencil.


Supplies: flower stamp, sentiment stamp & diamond stencil, Purple, Grass green & Jade Nuance powders (Magenta), Smooth Solar White 80lb cardstock (Neenah), Canson XL watercolour paper (Canson), Jet Black Archival Ink (Ranger), Versa Mark (Tsukineko), fine white emboss powder (Simon Says Stamp), black cardstock (Bazzill)


I started this card by running the Diamond stencil with a 4 1/4 x 5 1/2" piece of cardstock through my die cutting machine with an embossing pad to create a dry embossed textured background. I splattered it with Grass Green Nuance mixed with watercolour. Once dry, I trimmed off a 1/4" from the side and the top so that it would fit onto a 4 1/4 x 5 1/2" cardbase. I added dimension by adhering it with adhesive foam to the base.


Next, I stamped the Azalea multiple times using Archival ink on to Canson XL 140 lb cold press watercolour paper. After watercolouring the flowers with Purple Nuance and the leaves with a mix Grass Green and Jade Nuance, I let them dry. Once dry, I fussy cut the flowers out seperate from the leaves being careful not to cut up the leaves. Next, I cut out the leaves. Then, I arranged some of each into a pleasing cluster and glued them such that they still had dimensional layers. I added some black glitter glue on to all the stamin centres. While that has drying, I white heat embossed the Thank You part of the sentiment stamp onto a thin strip of black cardstock and snipped it to form banner ends. Lastly, I added that with foam tape to pop it up. 


I hope you enjoyed today's card and that you give stencil dry embossing a try.

TTFN,


*****

Magenta products used:

Saturday, July 14, 2018

Quick Cards


Hello Crafty Peeps! Sometimes all you need is a beautifully designed stencil, a stamp and some inks to make quick simple yet effective cards. I am sharing two Magenta cards made with a similar design on two different size card bases.


Both cards were made with precut and scored bases that can be found at a craft store. The first one is on 4 x 5 1/2" folded card base that I had aligned the Laces stencil in the centre before securing both with some tape (painter's tape or washi works best). Next, I started at the top and the bottom, using Peacock Feathers and Twisted Citron Distress inks and a blending tool, to gently and gradually add colour; first with the blue and then green. I was light of hand and built the colour intensity up at the ends and faded to nothing in the the middle where I would stamp my sentiment. On this card, I used the smaller Thank You sentiment as it was proportional to the card size.


Supplies: Laces Stencil and Sentiment stamp (Magenta), Reflections cardbase (Michaels), Tim Holtz Peacock Feathers and Twisted Citron Distress inks, Black Soot Archival Ink (Ranger)

On the second card, I wanted to show you how you can use the stencil size as is using a 5 X 6 1/2" cardbase and a simple placement design that works for it. I first secured the cardbase at the top and bottom to my craft mat with tape. Then, I aligned the Laces stencil with the centre of the card and secured it on the right and left sides as that is where they are larger than the base. I followed the same inking process as I outlined above however this time I used the same colours but in their Distress Oxide forms. I left a larger fade out to white in the centre to accommodate the larger Thanks sentiment. To finish this card off, I added some bling with some larger clear jewels in the centres of the each repeated design area.


Supplies: Laces Stencil and Sentiment stamp (Magenta), Reflections cardbase (Michaels), Tim Holtz  Peacock Feathers and Twisted Citron Distress Oxide inks, Black Soot Archival Ink (Ranger), jewels (Flourish with a Bling)


I just have to say that I am really loving the Peacock Feathers and Twisted Citron colour combo on these. Unfortunately the photos really do not capture the vivid nature of them in real life.


TTFN,


*****
Magenta products used:

Wednesday, June 27, 2018

Silhouettes Part Two -You Rock!


Hello fellow crafty friends! Today, I am sharing another foiled alcohol ink card made on Yupo using the Silhouette Spring Flowers stamp that I made for Magenta. While last time I shared a darker background with a white silhouette with a blue foil accents (found here), this one has a lighter background and a black silhouette with a green foil accents.


Supplies: Silhouette Spring Flowers stamp and alphabet chipboard (Magenta), Yupo paper (Yupo), Tim Holtz Citrus, Pool, Turquoise Alcohol Inks and Blending Solution, Black Soot Archival Ink, Picket Fence Distress Paint, Multi Medium Gel (Ranger), Bora Bora Green foil (Prima), stones (Emerald Creek), cardstock (CTMH)


I started with a 3 1/2" x 5" piece of yupo paper which I covered with alcohol blending solution and added drops of Citrus, Pool, and Turquoise alcohol inks in three rows from bottom to the top tilting the card to move the colours around. Once dry, I placed a green foiling sheet over top and burnished it onto the yupo background. Once peeled away, it sticks bits of foil to some of the tacky areas on the background.  


From there, I stamped the Spring Silhouette Flowers with Black Soot Archival ink. Next, I adhered the panel to a white card base. Then, I added the white acrylic painted "You Rock" chipboard sentiment using the Mini Alphabet chipboard letters and added some green foiling to them. Lastly, to complete the card, I glued on some tiny stones along the bottom of the panel.

If you give this technique or silhouette stamp a try, be sure to share it with me.

TTFN,

*****

Magenta products used:


Mini Alphabet 6 X 6 Chipboard Letters

Thursday, June 14, 2018

Magenta Magical Silhouettes


Today folks, I have a card that I created for Magenta. This one is a foiled alcohol ink card made on Yupo using the beautiful Magenta Spring Silhouette Flowers stamp that I am so fond of from the Spring release.


Supplies: Spring Silhouette Flowers and sentiment stamp (Magenta), Yupo Paper (Yupo), Tim Holtz Amethyst, Turquoise & Pool Alcohol Inks and Blending Solution, Jet Black Archival Ink (Ranger), Bora Bora Turquoise foil (Prima), VersaMark ink (Tsukineko), fine white embossing powder (Simon Says Stamp), white paint marker (Sharpie), white cardstock (CTMH)


I started with a 3 1/2" x 5" piece of yupo paper which I covered with alcohol blending solution and added drops of Amethyst, Turquoise, and Pool alcohol inks in three rows from bottom to the top. Once dry, I placed a turquoise foiling sheet over top and burnished it onto the yupo background. Once peeled away, it sticks bits of foil to some of the tacky areas on the background. 


From there, I stamped the Spring Silhouette Flowers with white pigment onto the background and white heat emboss powder. You have to be very careful with yupo and heating it as it can warp so do so with a very warmed up heat gun from the furthest distance away to heat the emboss powder as possible. Next, after edging the border with a white paint marker, I adhered the panel to a white card base. Lastly, to complete the card, I stamped the sentiment under the panel.


I love how vivid the background is with the alcohol ink and the foiling just adds more interest and panache. I hope you are inspired to give it a try.


TTFN,


*****

Magenta products used:

Tuesday, May 29, 2018

Gilded Dogwood


Hello my crafty friends! Today, I am sharing a floral guilded crackled watercolour card on the Magenta Blog. This one has some great texture in real life.


Supplies: Dogwood stencil, Thanks sentiment stamp, Hot Pink, Rosebud, Grass Green, & Jade Nuance Powders (Magenta), Canson XL 140 lb cold press watercolour paper (Canson), Distress Rock Candy Crackle Paste (Ranger), Vicki Boutin CreativFX Gold Glaze (American Crafts), VersaMark (Tsukineko), gold embossing powder (Emerald Creek), Vellum (Dollarama), Ticket Punch (Stamping Up)


I started with a piece of 140 lb watercolour paper and added Tim Holtz Rock Candy Crackle Paste through the Dogwood stencil.


Once dry and crackled, I secured the stencil back in place on the panel and dry brushed some Vicki Boutin CreativFX Gold Glaze onto the crackle. 


Once dry, I watercolour painted the dogwood flowers with Hot Pink and Rosebud Nuance and the leaves with Grass Green and Jade Nuance. While it was drying, I heat emboss stamped the Thanks for everything you do sentiment with gold embossing powder on vellum and ticket punched the corners. I trimmed down the Dogwood panel and adhered it to a base card adding the sentiment with clear foam tape.


*****

Magenta products used:


TTFN,


Saturday, May 19, 2018

Escape the Everyday


Art journaling is a great way to escape the everyday and try something new. It gives a greater freedom to just play and enjoy the process of making art. I am up on the Magenta blog today sharing this mixed media art journal page with a simple tutorial.


You can check out the tutorial and more detailed photos over on the Magenta blog here.


*****

Magenta products used:

Nuance - MNU005 - Hot Pink
TM251 Triangles

Art is the only way to run away...

Geometry - Small Diamond #1

Nuance - MNU008 - Golden Yellow

Butterfly
*****


Hope you get to spend some time running away with art this Victoria Holiday long weekend!


TTFN,


Sunday, April 29, 2018

Clean & Simple Makes Me Smile


I love the look of a Clean and Simple card and add watercolouring to it too and it is guaranteed to make me smile. Today, I am sharing such a card on the Magenta blog.


Supplies: XL 140 lb watercolour paper (Canson), Floral stencil, Happy Birthday stamp, Aquamarine, Spring Green and Violet Nuance powders (Magenta), white cardstock (CTMH), black cardstock (Bazzill), Clear and white embossing powder, Wonky Rectangle die (Simon Says Stamp), Emboss It dabber (Ranger), jewels (Offray)


I started with a piece of 140lb cold press watercolour paper and clear heat embossed using the Floral Pattern stencil. Next, I used a wet on wet watercolour technique to add colour. I pre-wet the area around the image emboss resist that I wanted to colour and then added Nuance powders (Violet, Spring Green and Aquamarine) pre-wet as watercolours. While it was drying, I stamped and white heat embossed the Happy Birthday sentiment on black cardstock and cut it to size. Once the panel was dry, I die cut it and mounted it on a cardbase. I popped up the sentiment and added some jewels to the flower centres.

*****

Magenta products used:

TM188 Floral Pattern
TM188
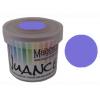
Nuance - MNU012 - Violet
MNU012
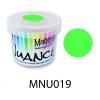
Nuance - MNU019 - Spring Green
MNU019
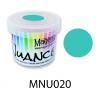
Nuance - MNU020 - Aquamarine
MNU020
Happy Birthday
07.743.G


I hope my Clean & Simple Birthday Card made you smile today and that you are inspired to give it a try.


TTFN,