Pages

Monday, December 30, 2019

Snow Thanks


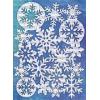
With so many seasonal celebrations and get togethers at this time of year, a quick seasonal Thank You card is always de rigueur. Today, I am sharing just such a simple sparkly card over on the Magenta blog.


Supplies: Snowflakes mask and Thank You stamp (Magenta), Tim Holtz Cracked Pistachio Distress Ink (Ranger), Silver Sheer Shimmer Spritz (Imagine Crafts), VersaMark ink (Tsukineko), silver glitter emboss powder (Emerald Creek), Assorted Moonshine sequins (Simon Says Stamp) 


Head on over to the my blog post here to find out how to make it.

TTFN,


*****


Magenta products used:

MC05 - Snowflakes
Thank You - Extra Large

Wednesday, October 30, 2019

Leaful Thanks


Hello crafty friends! Today I have a fall themed thank you card that I am sharing over on the Magenta blog.


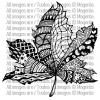
Supplies: Doodled Leaf stamp, Be Thankful stamp, Autumn Leaves stencil, patterned papers (Magenta), Kraft paper (The Paper Company), Texture Paste, Clear Rock Distress Candy Crackle Paint, Candied Apple and Mustard Stain Distress ink, Sunshine Yellow Alchohol ink, Multi-Medium Matte (Ranger), burlap, muslin and hemp twine (Misc.)


On a 5 x 5 1/2" kraft card base, I stamped the Doodled Leaf with Candied Apple Distress ink. I used a waterbrush to move the colour to fill the leaf and added some red splatters. Once dry, I restamped the leaf to darked the image. On burlap, I stenciled the oak leaf with Texture Paste and on muslin, I stenciled the poplar leaf with Clear Rock Candy Distress Crackle Paint. Once they were dry, I added Mustard Seed Distress ink to the oak leaf and Sunshine Yellow Alcohol ink on the poplar leaf. Then, I fussy cut the bird on a branch from the Last Serenade pattered paper. Next, I heat emboss stamped the Thankful part of the Be Thankful sentiment stamp and add brown marker to create shadows. Then, I wrapped the card with hemp twine and secured it before adhering all the other pieces in layers. 

This was a fun card to make. I love all the textures of this one. Hope you found some inspiration from it today.


TTFN,


*****

Magenta products used:

Friday, October 25, 2019

Creepy Caravan Halloween Blog Crawl


Welcome to the next stop on the Creepy Caravan Blog Hop! Crafty mixed media mavens have been busy fashioning Halloween creations for your seasonal enjoyment and inspiration. Sit back, relax and crawl along with the Creepy Caravan.


Cassandra here, joining in the hop with this "Spells" altered book... great for a seasonal home decor display or a prop for Halloween costumes.


I started by applying black gesso with a paint brush to the jacket of an old hardcover book.


Next, I created patches for some of the really torn areas of the cover using cheesecloth and tissue paper and then applying Clear Rock Candy Distress Crackle Paint to those areas. Once they were dry and crackled, I used Texture Paste through the Constellation stencil from Magenta to add the background stars and constellations. Then, I adhered the stacked cardstock cut outs that I had created using a Silhouette Cameo.


After painting everything with black acrylic paint, I started to apply Prima Finnabair's Art Alchemy waxes with a small brush and at times with my finger to smear it in some spots. I used White Gold Metallic Wax over all the raised areas and then added some Lucky Emerald Antique Brilliance to the tree and Mystic Turquoise Antique Brilliance to the birds.


I replaced the jacket cover onto the book and took a photo with the book laying open in the middle so that the jacket can be seen in its entirety.


Supplies: Black Gesso, Matte Texture Paste, Clear Rock Candy Distress Crackle Paste and Multi Media Matte (Ranger), cheesecloth, tissue paper (misc.), Constellations stencil (Magenta), tree, crows, sun, creseent moon amd letters cut files (Silhouette), cardstock (Staples), Fawndementals Glue (Lawn Fawn), black acrylic paint (DecoArt), Finnabair White Gold Metalique Wax, Lucky Emerald and Mystic Turquoise Antique Brillance Wax (Prima) 


Here is an angled view as part of a Halloween display on my mantle. I hope you enjoyed my altered creation and that I have inspired you to create your own book of spells.


For your next stop on the Creepy Caravan Blog Hop, please head on over to Life in a Snapshot.

If you are just beginning on the Creepy Caravan Blog Hop with your visit here on my blog, below is the full list of all the inspirational talented artists in hop order:


A big thank you goes out to Cathy Frailey (owner of Bleeding Art challenge blog) for organizing this hop. Be sure to visit all the hop stops for some awesome Halloween themed mixed media creations and be sure to leave some love!

*****

I am entering my altered book into the Simon Says Stamp Monday Spooky Challenge. Challenge details and DT creations can be found here.


Happy Halloween!


Sunday, September 22, 2019

Enjoy the Little Things


For this week's Simon Says Monday Monochrome challenge, I created a double sided mixed media bookmark with some new to me KaiserCraft goodies.


While I like both sides, in the end, I really love how the "B" side turned out and it best represents the Monochrome theme. I coloured the background with a combination of Cracked Pistachio Distress Oxide ink and Cracked Pistachio Distress ink. Next, I stamped the KaiserCraft Flutter stamp and then coloured the butterflies with Peacock and Turquoise Dina Wakley Scribble Sticks. Once it was dry, I restamped the image to replace the butterflies' line details. Once that was dry, I black heat embossed stamped "the little things" part of the KaiserCraft Antiquities stamp and splattered a little bit of gold with Gold Sheer Shimmer Spritz. The sewing came after as part of adhering the fabric on the "A" side.


The "A" side was gold stenciled on canvas with the KaiserCraft Distress Dots after the canvas was stitched to the cardstock base along with the strip of KaiserCraft Amore patterned paper. I also punched a circle out and adhered it to the top prior to hole punching as a reinforcer for the Cracked Pistachio and Evergreen Bough Distress Ink coloured seam binding crinkle ribbon. The "Enjoy" was from the same Antiquities stamp which I black heat embossed on vellum and fussy cut out. The butterfly was fussy cut from KaiserCraft Tanished Patterned paper.

Be sure to check out the other wonderful Monochrome creations over at the Simon Says Stamp Monday Challenge site.


TTFN,


Friday, August 30, 2019

Floral Embossed Layers Magenta Card


Hello crafty friends! Today, I am up on the Magenta blog with a floral tent style mixed media card made with textured emboss layers.


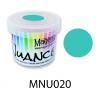
I started with black heat emboss stamping the Azalea flower several times on a coffee filter and then colouring it with Aquamarine Nuance powder. While it was drying, I white heat embossed stamped the Leaf Lines leaves on vellum and fussy cut them out. Next, I clear heat embossed stamped the Delicate Feminine Text on a 4 1/2" x 6" white cardstock card base and then blended two green Tim Holtz Distress inks; Twisted Citron as the base with the addition of Mowed Lawn starting at the top and fading the colour as it comes down. Returning to the now dried flowers, I fussy cut them out. Lastly, I wrapped the card with cream hemp string, adhered the leaves and flowers with dimensional clear foam tape and then added a bunch of Simon Says Stamp Assorted Moonshine sequins.

I really like the dimension and textures on this card. I hope you have enjoyed today's card.


TTFN,


*****

Magenta products used:

Azalea
Azalea


Sunday, August 4, 2019

Bright and Cheerful Notebook


Hello crafty friends! Happy Sunday to you. It is a beautiful one in my neck of the woods this Canadian Civic Holiday long weekend and I want to share a little mixed media goodness with you.


Nothing like a challenge to get you to use crafty supplies. I finally got a chance to play with Vicki Boutin's Color Kaleidoscope collection which I used to alter the cover of a branded advertising swag notebook. My inspiration was Simon Says Stamp Monday - Bright and Cheerful Challenge. Vicki’s collection oozes that in spades hence that I chose to use it.

Courtesy of my insurance provider, the notebook started like this...


I began by dry brushing gesso on to it in three layers allowing time to dry in between which is when I was doing my fussy cutting of the stamped leaves and butterfly along with the distressing and sharpie inking the edges of the paper embellishments. Once the gesso was dry, I used Vicki's script stencil with texture paste and once that was dry, I added the gorgeous Juicy Pear green watercolour with her watercolour marker, spritzing it with water to make it run where I wanted and dabbing off areas that I wanted to lighten.


Once it was dry, I started to arrange the varies altered bits from the embellishments and sticker book when I decided I needed a banner strip. So I cut a piece of the Beyond Words patterned paper into a strip, banner cut the end and then spritzed it with water, crinkling it up to dry a bit. Once it was slightly damp, I straightened it out to my desired length and look before heat setting it with a heating tool. Once I was pleased with the arrangement, I adhered all the paper pieces, popping some up with bits of scrap cereal box cardboard as I went along. To finish it off and give it a touch of glitter, I used Vicki's Iridescent Glitter Texture Paste.


One of the things that I love about this collection is that the packaging is usable. Yeah for up-cycling! I couldn’t find a paper ephemera size butterfly in the size and colour that I wanted until I spied the one on the package as I was putting the pieces back in the package. It was just what I wanted so fussy cut it out. Ditto for wanting another orange flower. Again, I turned to the packaging to cut out the partial flower which works perfectly when tucked behind another layer.

Here's another look at the finished cover.


Supplies: Vicki Boutin Color Kaleidoscope [branch of leaves stamp, embellishments, sticker book, packaging, Beyond Words patterned paper], Vicki Boutin script stencil, Juicy Pear Watercolor marker, Iridescent Glitter Texture Paste (American Crafts), gesso (Golden), Texture Paste and Multi Medium Matte Glue (Ranger), Obsidian pigment ink (Altenew), black marker (Sharpie), white cardstock and OTIP notebook (Misc.)

Be sure to check out the Simon Says Stamp Monday Bright and Cheerful challenge's inspirational creations by the DT and other participants here.


TTFN,


Wednesday, July 31, 2019

Mini Notes of Thanks


Those that follow me might have noticed that I tend to make a lot of thank you cards as I am a believer in showing kindness and appreciation and that I tend to not make standard sized cards. I create for the sized area that I need to based on my idea or the scale size of the products used. This leads to a copious amount of various sized widths of cardstock strips. So I like to find ways to use up this stash and other various odds and sods from previous projects. Besides making ATCs, another way I have found that works well is to make cheery little mini cards of thanks. I have found that these mini gems always illicit a surprised delightful reaction from the receipt both for their novel size and cuteness factor.


Supplies: Apple Blosson Bouquet stamp, Mango Tango and Grass Green Nuance (Magenta), Tim Holtz script stamp (Stampers Anonymous), Vegas Gold and Irridecent embossing powder (Emerald Creek Craft Supplies), Thanks Script Die (Simon Says Stamp), black cardstock (Bazzill), vellum (The Paper Company), white cardstock and coffee filter (misc.)

The background was heat embossed stamped with Emerald Creek Vegas Gold emboss powder using a Tim Holt script stamp and splattered with Magenta Mango Tango Nuance. The sentiment is a multi layered die cut from Simon Says Stamp Script Thanks.


The flowers were created by iridecent heat emboss stamping on a coffee filter. To make the flowers, you will need a coffee filter and flower image stamp. On this card, I used the Magenta Apple Blossom Bouquet stamp. Load the stamp with VersaMark ink and stamp it onto the coffee filter. Here, I stamped the image four times prior to adding fine Iridescent glitter embossing powder. This will give you lots of extras for future projects. Once it is heat set, the emboss powder saturates the filter fibres and creates a perfect barrier for watercolouring.


Next, place the filter on a craft mat and spritz it with water so that it is fully saturated. Then, carefully pop the lid off the colour of Nuance that you wish to use (I used Magenta Mango Tango Nuance). Wet your paint brush and then pick up just a little bit of Nuance powder on the tip of the brush.


The colours are extremely concentrated and a little goes a long way. Start in the centre of the flower and dab the colour on, letting the water carry it to the edges. Add more spritzes of water and dab colour as needed to help move it and get the colour intensity that you want. Then, let it dry... either naturally or you could use a either a heat tool at a distance or a blow dryer on warm & low setting. Fussy cut the coloured flowers and use as you wish. They can be used singlely, like I did on this card, or you could even layer them up for a more dimensional flower. I added leaves which were free hand painted with Grass Green Nuance on vellum and then fussy cut when dry.

I am entering this card into Simon Say Stamp Monday Bright and Cheerful Challenge and Simon Says Stamp Flickr Challenge #128 - Anything Goes.

I don't always blog about smaller fast makes here on my blog. I did share these next two earlier this month on my IG account as part of Kathy Rac's 30 Days of Colouring and World Watercolouring Month. These are also 3 x 3" cards made from left over cardstock and watercolour paper (hence the different whites).


They are clear heat embossed stamped with a Close to My Heart mini stamp and painted with Kuretake Zig Gansai Tambi watercolours.

I hope you have been inspired to use up some scraps in make bright cheery cards to bring a smile to someone's day. Be sure to share in the comment or tag me on social media if you do.


TTFN,


Tuesday, July 30, 2019

Florals and Foil


I finally got my hands on some Altenew products and decided to play along with their July Inspiration Challenge. To colour this one, I went with watercolour to keep up my watercolouring for World Watercolour Month.


I used the Altenew Floral Drape stencil with a mini mister and Mijello Mission Gold watercolour paints on Strathmore 400 series watercolour paper. Once dry, I added some gold splatters with Gold Sheer Shimmer Spritz and then, I used a gluestick along the bottom and added gold foil flakes. Lastly, I gold heat emboss stamped the sentiment with the Altenew mini Hello stamp.

Here you can see the challenge image:


Be sure to check out the challenge post here for an inspirational video for the beautiful watercolour card by Therese Calvird.

TTFN,


Happy Thoughts Magenta Bookmark


With summer vacation, comes time to read and I found that I was in need of a new bookmark so I decided to make some new ones. Today, I am up on the Magenta blog with this mixed media book mark. I used a combination of textures and techniques... gold leaf with a stencil on muslin, emboss resist watercolouring an ATC coin sized flower, and bringing it all together with stitching... in creating this one.


I started by clear heat emboss stamping the smaller Rose Canina stamp on Canson XL watercolour paper and watercolouring it with Rose, Citrus and Paradise Prima Pastel Dreams Confections watercolours. Once it was dry, I used a 2 1/2" circle punch to cut it out.


Next, I cut a 3 x 6 3/4" piece of kraft paper and used my favourite Script and Postmark stamp with VersaMark ink to completetly stamp the entire length of the base.


Then, I cut a 2 1/2" x 6" piece of muslin and removed thread strands to distress it. Next, I used Cosmic Shimmer glue through the Large Old Lace stencil applying it with a small stiff bristle brush. Once it was set, I added the gold leaf and used a brush to burnish and clean it off revealing the guilded areas. (Tip: Using a waffled/grooved static sheet like a Swiffer sheet helps clean up the fly away small bits of gold so that it doesn't get everywhere.)


Then, I white heat emboss stamped the "happy thoughts" part of the Think Happy Thoughts stamp on black cardstock. Now that I had all the parts, I was ready to tack them down with a little gel medium so that I could sew them together.


Supplies: stencil and stamps (Magenta), craft cardstock (CTMH), XL watercolour paper (Canson), Pastel Dreams Watercolour Confections (Prima), VersaMark ink (Tsukineko), clear and white embossing powder (Simon Says Stamp), black cardstock (Bazzill), 2 1/2" circle punch (Stampin' Up), Cosmic Shimmer Foil & Glitter Glue (Creative Expressions), muslin, goldleaf, thread (misc.)


I love the shine of the foil, the feel of the fabric and the softness of the watercoloured flower. This is sure to make me smile everytime I use it. Yes, happy thoughts indeed!


TTFN,

*****

Magenta products used: