Pages

Monday, March 30, 2020

Thinking of You


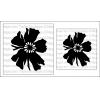
Today, I am up on the Magenta Blog sharing a card that I had created this month using a watercolour pencil crayon stencil trace and Nuance watercolour technique on watercolour paper to make its leaves background.


This card features a little Nuance watercolouring with emboss resist stamped coffee filter flowers. To learn how I created this card, head on over to the Magenta blog here

TTFN,


*****


Sunday, March 29, 2020

Music


Hi crafty friends! I have wanted to join in Finnabair's Art Daily Cafe monthly challenge the last couple of months but I was swamped at work and not able to at that point. Now with much time on hand, I used the February moodboard/prompt to create this Music art journal page. The theme was Haiga- visual poetry and the colour was Deep Red.


I started out by collaging cream colour tissue paper onto a double page spread in my Moleskin art journal. I added musical notation pieces from the Finnabair Musica decorative tissue. Once that was dry, I used Finnabair white gesso to blend and push that layer back. When that was dry, I stamped with the Finnabair Script stamp and black archival ink. Then, I covered the entire page with Finnabair clear gesso so that it would give it some tooth for the watercolours to stick.


Next, I applied texture paste through the Finnabair Tapestry stencil. While that was drying, I picked through my Prima patterned paper stash to decide what papers would work for what I had in mind. Then, I used a mix of Prima Red Parrot 19 and Cacao 24 watercolours from the Tropicals Confections set to get the desired red colour. I used a brown Stabilo All pencil to add a brown boarder before adding splatters in both the red and black acrylic once set. While that was drying, I cut a journal card from the Printery Collection Page Four patterned paper, distressing the edges and fussy cut out a bunch of roses from the Tales of You & Me A4 Collection Kit patterned paper. I found the perfect Prima felt sticker from my stash to create a ground strip area on which I created the focal point with the journal card for the haiku and the fussy cut florals.


I cut out to butterflies and added them along with the Prima fabric letter stickers to complete the page.


You can check out what others have created on Finnabair's blog here or use the hashtag #dailyartcafe on Instagram or Facebook. Now I look forward to tackling January's- Maps and March's - Moonlight moodboards too.

TTFN,


Saturday, March 28, 2020

Love & Hugs Bookmark


Hello creative friends! Today's crafty creation is inspired by Hero Arts' Anything but a Card challenge and Kathy Raccosin's The Daily Marker 30 Day Coloring Challenge. My colouring medium of choice once again is watercolouring. This time I used a watercolouring stamping technique with Tim Holtz distress inks and the Hero Arts Florals Rose Stem stamp along with my MISTI.


I started by placing a trimmed piece of Strathmore 300 Series Smooth Bristol paper into my MISTI and then inked up the Rose Stem stamp flower section with Abandon Coral distress ink and spritz it with water prior to stamping it. Once it was stamped, I used a waterbrush and ink smooched on a craft mat to watercolour the flower. Once the ink had absorbed into the paper, I reloaded the stamp with Abandon Coral ink and re-stamped it once again. Then, I repeated the process for the leaves, stem, and stamen with Peeled Paint Distress ink. Once one flower was done, I re-positioned the stamp to the next spot and repeated the same process.


Once all three flowers were complete, I stamped the Hero Arts Love & Hugs from the Rose stamp set sentiment three times with Jet Black Archival ink. Next, I placed the Hero Arts Ornate Floral Stencil over top of the bookmark and used a sponge inked up with Broken China Distress ink to add in a bit of a blue background. Then, I splattered the bookmark with the coral and green ink. Once that was dry, I tacked the panel to a Kraft base and stitched it together to complete the bookmark.


I am also entering this into the Simon Says Stamp Wednesday Everything Goes challenge along with the Hero Arts Anything But A Card challenge.   


TTFN,


Friday, March 20, 2020

Life is Better with You Friend


Happy Spring to those readers that are from the northern hemisphere (and happy fall to those in the southern one)! I chose a bright cheery spring colour combo for today's colouring as I join in Day 20 of Kathy Raccosin's The Daily Marker 30 Day Coloring Challenge with another Angie Blom Digital Design stamp for this card. This time I used the Unicorn Love digital stamp laser printed on Strathmore 300 Series Smooth Bristol paper and watercolours. You can see my swatched watercolours combo on the bristol strip beside the finished card.


I started by using a Molotow masking fluid pen and covering all the little circles, dots and V hearts along with the single line curls in the mane. Next, using Mijello Mission Gold watercolours, I painted the top part of the background with Cobalt Turquoise. Once it was set but before it was dry, I placed the older Prima Jamie Dougherty Spark stencil over it and using a dampened papertowel, I removed some of the watercolour through the stencil to add some texture and interest to the background. While that area was drying, I turned to colouring the flowers on the unicorn's head. I used some already mixed greens from my Mijello Paint palette and used a watered down version of Bright Clear Violet for the first layer of the flowers and then added more concentrated touches. 


Next, I turned to the unicorn's body. I added in shading with a grey/graphite Stabilo All pencil and activated it with water. Then, I watered down some Vicki Boutin Iridescent CreativeFX glaze and painted the body with it to give it a pearlescent shine for some magical shimmer quality. The shading didn't show through enough in some areas so I added a touch of Indigo watercolour to the mix and then painted over the shaded areas to define them more. Next, I added some white watercolour to a bit of the iridescent glaze to lightened areas that I had left for highlights. It is really hard to show the shimmer in a photo but I tried angling the card as I was taking the photo to see if I could pick it up. If you look at the ears and carefully on the body, you might see it. 


Then, I coloured the grass. I started with a wash of Yellow Green and then added bits of Sap Green and Hooker's Green. While that was setting up, I erased the masking fluid from the single curl lines of the unicorn's mane. Next, I added the final green touches with a concentrated amount of Sap Green on the blades of grass and in the circles and leaves.


Next up was the mane. For pink, I used the Zig Clean Color Real Brush marker. I started by pre-wetting sections that I was going to work on with water. Then going in with the marker along the ends and using more water and a number two brush round brush to pull the colour up through the sections to create an ombre effect. While that was drying, I added some touches of pink to the background v hearts and iridescent glitter glue to the dots, circles and v hearts. Then, I erased the masking fluid on the mane and added the glitter glue there too. Next, I did the same to the grass and the unicorn's corn and set it aside to dry while I cut and folded the card base.

Now with the painting dry and complete, I die cut it with the Simon Says Stamp Wonky Rectangles die. To finish off the card, I adhered scrap cereal board to the back of the die cut panel and glued it onto a white cardbase that I sized to allow a 1/4 inch frame area. For the sentiment, I used the one that comes with the Fox and the Owl digital kit that I had laser printed on my initial bristol piece. I cut it out, cereal board backed it and adhered it to the card. I went over some of the lines with a Pigma Micron 005 black pen to darken them. Lastly, I punched out some mini butterflies from the scrap cast off areas from the die cut panel background and added two of them. Here is a another look at the finished card:


Supplies: 300 Series Smooth Bristol (Strathmore), white cardstock (Staples), unicorn and sentiment digital stamp (Angie Blom Digital Designs), Mission Gold watercolour paints (Mijello), pink Zig Clean Color Real Brush marker (Kuritake), grey/graphite All watercolour pencil (Stabilo), Vicki Boutin Iridescent CreativeFX Glaze (American Crafts), Jamie Dougherty Sparks stencil (Prima), Hologram Iridescent Glitter Glue (VivaDecor), Wonky Rectangles Wafer Die (Simon Says Stamp), butterflies punch (Martha Stewart), black 005 Pigma Micron pen (Sakura), Original Tacky Glue (Aleene's)


Design techniques, products used and colour inspirations came from various Simon Says Stamp challenges - Monday Challenge Blog's Stencil Fun challenge, the Simon Says Stamp Flickr Challenge #145 Crazy for Coloring, and Simon Says Stamp IG Spring has Sprung challenge. Be sure to check each of the SSS challenges and Kathy's blog, FB or IG #thedailymarker30day for awesome eye candy and inspiration.

TTFN,


Tuesday, March 17, 2020

With a Little Luck


Today's artsy share is a little gem of good luck. I created this ATC inspired by spring and the March birthstone of aquamarine which is the challenge prompt over at the Funkie Junkie Boutique.


I started with piece of watercolour paper which I had experimented with some shades of Tim Holtz Distress ink greens. I cut it to ATC size and then stenciled some wild flowers with black acrylic paint through a Prima mini stencil. Next, stamped with the Finnabair script stamp and Archival black ink. Then, I used the Prima mini lace stencil and applied Ranger Opaque Crackle Texture Paste. Once dry and crackled, I added in some more greens with Prima Apple Green 06 confections watercolour and Tim Holtz Peeled Paint distress ink. Once that was dry, I added splatters of Gold Sheer Shimmer Spritz and Finnabair Metallique Mermaid Teal acrylic paint.


While that was drying, I turned my attention to colouring the chipboard and flowers. I used Finnabair Avocado Green, Emerald Liquid Acrylic paints and Mermaid Teal Metallique paint. This all dried super fast so I was able to add little touches of White Gold wax right away. Then, I added some touches of the Mermaid Teal watered down onto the mini flowers and twisted the flower stems to add some further embellishment interest.


After distressing the edges of the ATC base, I glued down the chipboard pieces, added some gold thread, the flowers, a die cut butterfly and aqua Prima Pebbles. To finish the ATC off, I white heat emboss stamped the Good Luck sentiment onto a strip of black cardstock and adhered some scrap pieces of cereal board to the back to pop it up.


Head on over to the Funkie Junkie Boutique here to see their DTs inspiration and other participants take on the Aquamarine challenge.

TTFN,


Sunday, March 15, 2020

You're Pretty Awesome!


Yes, you are crafty friends!  I did some watercolouring for Day 15 of Kathy Raccosin's The Daily Marker 30 Day Coloring Challenge with an Angie Blom digital stamp for this card. If you want to watercolour using a digital image but don't have a laser printer, no worries, change the ink colour to a tan/beige one (I got it close to the colour of Tim Holtz Antique Linen Distress Ink) on your image as you print it with an inkjet printer and no-line watercolour it. That is what I did on this one.


I made the So Special flower image rather large to give this a try, knowing that I would cut it apart to use it on a card later. I printed it on 85 lb cold press Color Factory A4 (8.3 x 11.7") watercolour paper by MultiCraft. I picked it up at a dollar store on town and wanted to give it a try. It is a good size that fits in the printer without needing to be trimmed. I used Mijello Mission Gold paints and a size 2 Silver Brush to watercolour it. Then, I used a Derwent Inktense watercolour pencilcrayon to add some tan to the centres. I added some leaf line details and shading with a tealish Staedtler pencil crayon and shadows with a dark grey one.  This is how it looked once finished before I cut it apart:


I cut a piece of cardstock and used mat gel medium to adhere the up-cycled old dictionary page to it and then added clear gesso to the front. While that was drying, I fussy cut the flowers out and cut along where I felt would give a good size for each piece. Once that background was dry, I added watercolour paint splatters with the greens I had used in my painting to it. I mounted that onto a 7 x 5.5" cardbase popping it up with some cereal board. Then, I arranged the flower pieces and adhered them along the edges but left most part free to move and added some small pieces of cereal box board underneath the flowers to give further dimension.


Next, I printed off the "You're Pretty Awesome" sentiment from Angie's Everyday Greeting 1 set on white cardstock, trimmed it and inked the edges with black ink. I added a couple of layers of cereal board strips underneath as I adhered it to the card to pop it up a bit. Lastly, I pulled some old Making Memories patterned paper from my stash and created an envelope for the card to finish it off.


I am entering this card into the Simon Says Stamp Monday A Bit O' Green Challenge, the Simon Says Stamp Wednesday Use Some Green Challenge, and the Flower Challenge #42 Anything Goes Challenge.


Supplies: So Sweet & Everyday Greetings 1 Digital stamps (Angie Blom Digitals Designs), ColorFactory watercolour paper (MultiCraft), Mission Gold watercolours (Mijello), Tan Inktense watercolour pencil (Derwent), teal & dark grey pencil crayons (Staedtler), gel medium (Faber-Castell), clear gesso (Liquitex), cardstock (Staples), Tim Holtz Black Soot Archival ink (Ranger), dictionary page (Misc.)


TTFN,


Friday, February 28, 2020

Mandala Birthday


Hello Friends! I am up on the Magenta blog today with this heat embossed and dry debossed mandala birthday card.


I started with a piece of Canson XL watercolour paper and loaded the Mandala 2 mask with VersaMark before running it through my Big Shot die cutting machine. Next, I covered the embossed area with clear emboss powder and heat set it. Then, I watercoloured the various design areas with Mango Tango, Turquoise and Cerulean Blue Nuance powders. While it was drying, I stamped and white heat embossed the Happy Birthday top line from the multilingual Birthday stamp in order to create the sentiment strip. I adhered it with foam tape and then added small jewels to finish off the card.


Supplies: mandala mask, sentiment stamp, Mango Tango, Turquoise and Cerulean Blue Nuance powders (Magenta), VersaMark Ink (Tsukineko), clear and white Fine Embossing powders (Simon Says Stamp), XL watercolour paper (Canson), black cardstock (Bazzill), jewels (Offray) [orange envelope shown made from CTMH cardstock

I created a coordinated envelope using the WRMK Envelope Punch Board with a matching CTMH cardstock which really makes the colours pop. If you liked the mandala used on the card and are into creating with mandalas, be sure to check out the many others in the Magenta collection here.


TTFN,


*****

Magenta products used:
Mango Tango
Nuance - MNU001 - Turquoise
Turquoise
Nuance - MNU011 - Cerulean Blue
Cerulean Blue

Sunday, February 23, 2020

Butterfly Bliss Shabby Shadow Box Frame


Hidy ho crafty friends! Today's creation is a piece of home decor. It is a treat when you find two challenges that mesh beautifully and provide so much wonderful inspiration. Such was the case with this week's Simon Says Stamp Monday Frame It challenge and A Vintage Journey's February Against the Grain challenge.


I created this home decor piece in a shabby style with patterned papers from the pretty KaiserCraft Scrap Studio collection. I cut the Tarnished pattern paper into a 4x6 piece and backed it with up-cycled cereal box board. Next, I stamped the KaiserCraft Sheet Music stamp with Wendy Vecchi Watering Can grey Archival ink in a few places. Then, I spread Faber-Castell Glass Bead Glitter Gel through the KaiserCraft Distressed Dots stencil.


While that was drying, I fussy cut the butterfly from the Course pattern paper and used a Golden Stardust Gelly Roll pen to trace over the butterfly's detail lines. Once that was done, I added Glossy Accents to the body and the two black dots for a little added dimension. I also trimmed off the pattern paper label from a piece of pattern paper from the KaiserCraft Everlasting collection, spritzed it with water, crumpled it and then straightened it somewhat to dry. This gives it a distressed look.


Once the glass bead glitter gel was dry, I added white watercolour paint from my Mijello Mission Gold watercolour set to help accent the distressed dots for added interest and shabbiness. While that was drying, I started to work on the frame. I used a Dollarama wooden paint panel on its back side. I gave it a a very light coat of Liquitex white gesso and then added a thin bit of white Decoart Acrylic paint. I was very light handed and rubbed off paint as I went so to allow the woodgrain and the wood's unfinished roughness to show through. Once it was dry, I cut a piece of Bazzill white woodgrain cardstock to fit the inside and adhered it to the back.


Next, I was back to the focal piece. I tore my prepped pattern strip in two pieces and tacked it down prior to stitching the corners with Darice hemp cord. I adhered a flight trail of hemp cord with Ranger Multi media Matte gel and then the butterfly. Next, I glued down the Dollarama gold glitter wood letters spelling bliss. Then, I used Therm-o-web's Decofoil adhesive pen along the edges and added their gold Decofoil for a distress gilded look. To finish the piece off, I added a piece of cardboard to the back before mounting it in the frame so to give it added dimension and a shadow box effect.


I am really pleased with how this turned out. It was a stroke of luck that these challenges inspired this fun creation. Head on over to the Simon Says Stamp Monday Challenge here and a Vintage Journey: Against the Grain Challenge here to see some gorgeous eye candy inspiration and other participants takes on these challenges.

TTFN,


Sunday, February 16, 2020

Love to Create


Hi crafty friends! 

Today, I have an art journal page to share with you. The theme was inspired by this month's Dina Wakley Media Tribe's All About Love challenge and the product technique use by Simon Says Stamp Monday Crack it Up Challenge.


After using emboss ink through a Donna Downey script stencil and heat embossing with Tim Holtz Faded Jeans and Broken China Distress emboss powders, I coloured the Strathmore 400 Series mix media paper with both Picked Raspberry Distress Stain and Dina Wakley Blackberry Violet Acrylic paint. Once dry, I added the Distress Clear Rock Candy Crackle paint to some areas of my background and set it aside to do its crackle thing. While that was setting up, I covered a rectangular piece of cardstock with Dina Wakley washi tape and then freehand cut out a heart. Next, I adhered the fabric trim and then ran it through the sewing machine to give it a messy stitched look. When the crackle paint was dry, I used a black Stabilo All pencil along the edge and activated it with a waterbrush adding more All pencil to the crackle areas to make them stand out. 


Once that was dry, I glued down the heart, stapled the transparent Tim Holtz letters and adhered the computer generated "to create" cardstock strips.


Head on over to the Simon Says Stamp Monday Challenge blog here to check out the DT's inspirational pieces along with other participant's takes on this week's challenge. 

TTFN,


Sunday, February 9, 2020

Prima Pretties


I had some floral fussy cutting fun with the Prima Apricot Honey patterned papers. Paired with their matching glittery paper blinged out centre flowers results in a layered floral frenzy card.


Supplies: Apricot Honey pattern papers, ephemera pack, flowers (Prima Marketing), Tim Holtz Antique Linen, Brushed Corduroy, Spun Sugar and Worn Lipstick Distress inks (Ranger), Vintage Pink Glimmer Mist (Tattered Angels)


For the first layer, I cut a piece of the Tiny Blossoms pattern paper, spritzed it with water, crinkled it and then unfurled it to dry. Then, I distressed and inked the edges and added splatters of Vintage Pink Glimmer Mist before gluing it down to my card base. From there, I built up layers of fussy cut flowers and foliage from the Tiny Blossoms and Apricot Honey patterned papers along with the floral card from the Happiness Looks Good on You pattern paper which I also distressed and splattered. Next, I cut and distressed the words from the Deep Love paper and adhered them with some cereal box board for added dimension. Lastly, I added two Apricot Honey flowers and a fussy cut butterfly from the collection's ephemera pack.

I am entering this beauty in the Simon Says Stamp Monday Floral Frenzy challenge. Check out their design team's inspirational creations as well as all the other floral entries.


TTFN,